SkiReport.com | Ski Reports, Snow Report, and Ski Conditions
I just discovered this site and the corresponding android app. Worth it’s weight in gold.
Location : 14 Argilla Rd, Methuen, MA 01844,
SkiReport.com | Ski Reports, Snow Report, and Ski Conditions
I just discovered this site and the corresponding android app. Worth it’s weight in gold.
Location : 14 Argilla Rd, Methuen, MA 01844,
Rumor has it, that there is some truly great backcountry skiing nestled deep in the
Pemigewasset Wilderness of the White Mountains. My partner in crime Rob, did much of the background research, citing viewsfromthetop and the TGR forums as his main sources. Two sizable and steep bowls punctuate the southwestern flanks of Guyot. Unfortunately the nearest road (in winter at least) is no less than 8 miles away from the either of the bowls. In winter it would likely take the better part of a day to get there, making the minimun reasonable trip length 4 or 5 days: one to get in, one to get out, and 2 or 3 days spent skiing and camping at the base. The goal for the weekend was to ‘swing’ by Guyot, scope out the skiing and assess the whole plan for feasibility unencumbered by winter gear and while conditions are still mild.
View Guyot Recon in a larger map
In order to fit this whole thing into one of the shortening days we’ve been experiencing, we came out of hibernation at the ripe hour of 4:30 on Saturday morning. (Actually the plan was to get up at 4, but my alarm happened to have AM and PM reversed and Rob’s had some similar problem. I just happened to roll over and see that time around 4:20 AM.) We arrived at the trail head around 6 AM and were on the trail shortly thereafter. The sun had just recently crept over the mountaintops.
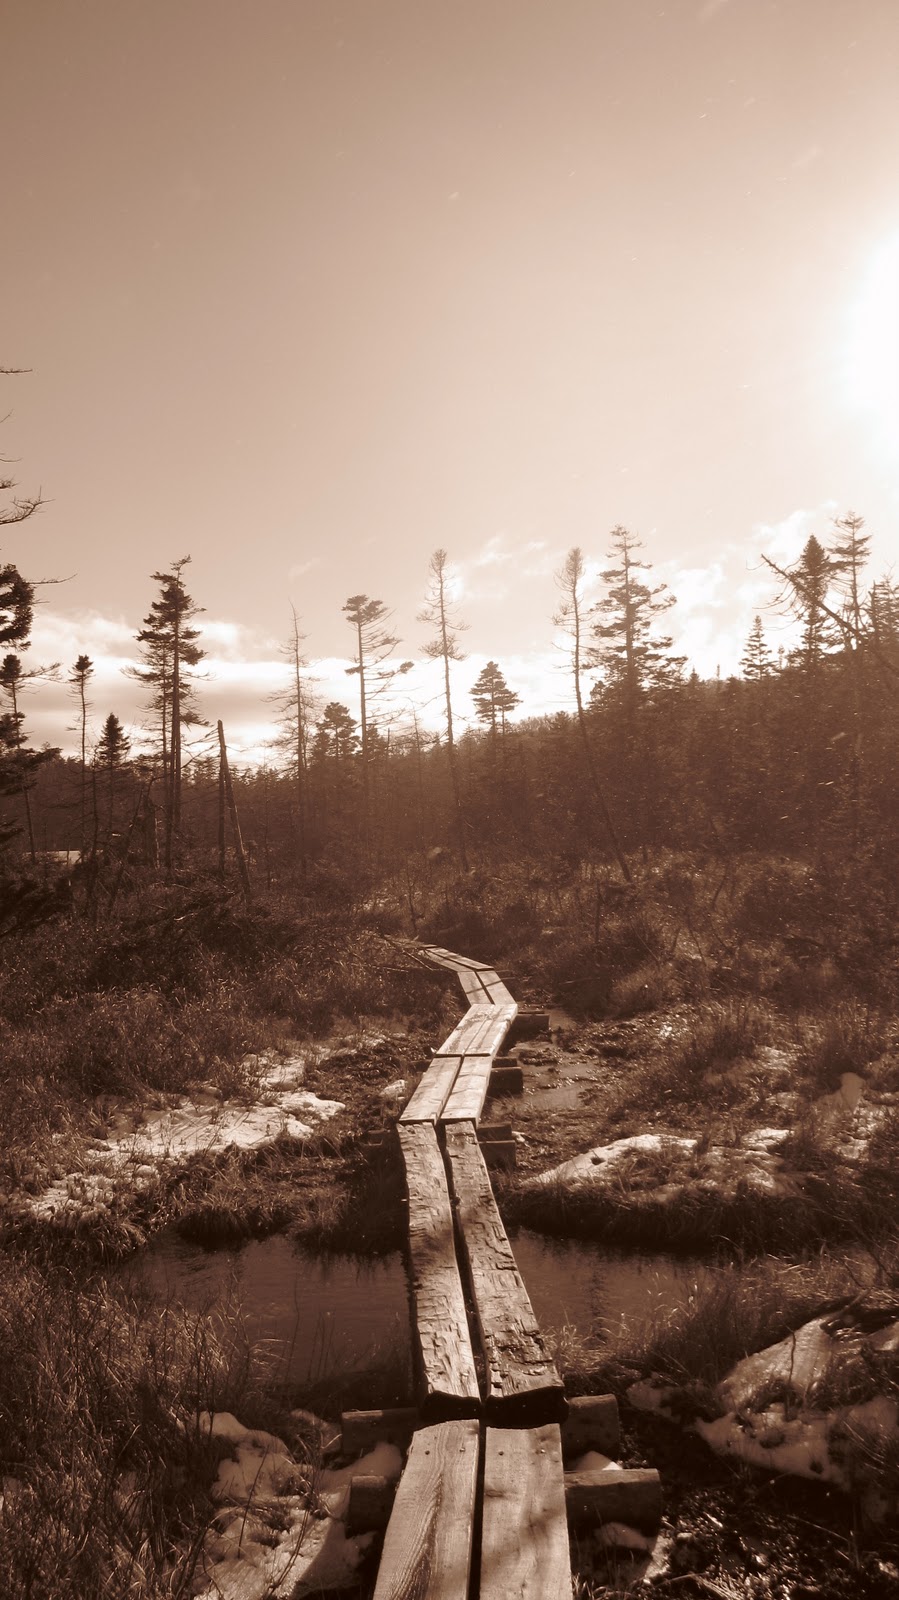
The first leg of the approach is literally pretty straight forward. You head north along the Lincoln Woods Trail and eventually the Franconia Brook Trail. These trails are formerly a railroad bed used for logging in the late 1800s. The remaining ties and several bridge footings can still be seen for most of the way. As you might expect this part of the hike isn’t that challenging, however it is a pleasant walk alongside all sorts of rivers (notably, the Pemi and Franconia Brook), ponds, and marshes. It’s prime moose country and we even saw some tracks on the trail, highlighted by the light dusting of snow and frost.
View Guyot Recon in a larger map
Redrock Brook marks the cutoff point for leaving the trail and heading off toward Guyot, at which point you turn Northeast and follow the brook into the bowls. We made fair time on the 7 mile approach, arriving at the cutoff point in about 3 hours. Having achieved only several hundred feet of elevation, the brunt of the trek was still ahead of us. We had several miles of bushwhacking and about 2000′ of vertical remaining – none of it was on proper trail. There are several abandoned logging roads and rail beds, however all of them are grown in and eroded. In the winter the best route would likely be simply skinning up the brook. We varied our approach, following the stream bed, animal paths, water runoffs and abandoned roads according to whatever seemed easiest. At one point the stream runs almost entirely underground and you can just walk right up the middle of it. However, for the great majority of the slog, you’re plowing through a morass of underbrush. It was a challenge to say the least and our pace slowed considerably.
View Guyot Recon in a larger map
We started the day under cloudy skies, and as the day progressed it became party cloudy with enough sun to warm us whenever we stopped for food and water, however as we gained elevation and got closer to the bowls it was an entirely different story. The wind seemed to funneling up the ravine into the bowls bringing with it plenty of cold and apparently moist air. We made it within 300 vertical feet of souther bowl but by this time virtually all horizontal surfaces were coated in fresh snow. The winds were outright howling and and snow was coming down pretty thick. I was tempted to pull out some of goggles. As we looked up the stream bed we could see that it became increasingly challenging: running water, snow, water ice, boulders, fallen tree…the banks of the stream were dense pine and spruce. It was now past noon and we’d been on the trail for over 5 hours. We had no idea what the weather was outside of the bowls, but it was a full blown blizzard where we were. We decided to call it quits and head back just short of our goal. It would take us another 5 hours at least to ex-filtrate and we would be lucky to be out before sunset.
The slog out was basically the same as the slog in since we mostly just retraced our steps in the snow. We tried to pick up some the abandoned roads which were reputed to be in the area but were not entirely successful in this endeavor. We picked up the actual hiking trail around 3 or 4 and hauled back out to the parking area, just off the Kancamagus. We finished around 4:30 PM after about 17 miles.
While we were unable to get a really good look at the skiing terrain, I have to claim that we accomplished our overall goals. We know the skiing will be great just from looking at topo maps and satellite imagery. The real unknown quantity was the hike into the area, which we now have a very good feel for and have learned many things from. Given the length of time required to get there we can’t really consider going for less than 4 days. Three would work technically, but it seems like a lot of work for only one full day of skiing. Given the duration of our stay in the this exceedingly remote area and the amount of food and other supplies we’d need while there, using sleds or ski-pulks would be mandatory. We’d skin nearly the entire way in. By storing the gear in a duffel lashed to the sled, we would have the ability to carry the entire apparatus short distances for any areas that prove unskinnable, though those would seem to be infrequent given a deep snowpack. An ultralight touring setup would go a long way toward easing our efforts on the way. Something to seriously consider would be purchasing cheap X-country gear and using some kick-wax for the entire approach and hauling the alpine ski gear in the ski-pulks.
Some obvious safety concerns surround the entire trip. It’s considerable remoteness would really force us to be completely self sufficient – if something were to happen we’d be a day away from help in good conditions. Avalanches are a real concern as well, especially with no formal forecasting for that area. We’d have to rely on our own limited forecasting skills and be prepared to make decisions accordingly. We’d also have to be ready to prepare some really weather-proof shelters if the wind and snow are anything like what we witnessed on Saturday. If we were to attempt such a trip, we’d have to wait for an ideal window of weather and avalanche conditions, free up an extended long weekend, prepare the pulks, maybe get X-Country gear, brush up on avy skills, be in seriously good physical condition and finally hope for the best along the way. It would be a pretty serious undertaking but would probably be incredibly fun if well executed.
Gear List (click links for more product info):
Indeed, the winter is nearly upon us. I know this not only because the calendar says so, but because Tramdock has been running more and more great deals on last year’s junk, because the beer store only has Christmas flavored beer (actually that’s a terrible weather vane, but I digress), because Ski-Net started up the where-to-ski-this-weekend column, because Skiing put out the ever dubious Top 100 Reports report , because I can see my breath nearly every morning (thank God, I can finally breath again), and because most importantly my enthusiasm for skiing has crept back into the spectrum of unbridled mania.
 |
| Powder baskets – lets hope they see some abuse in the upcoming weeks! |
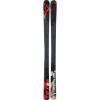
As a direct result of this uncontrollable enthusiasm a number of seasonal prerequisite tasks have come into sharp focus: deal hunting for a new, non-battered helmet seems advisable, perhaps a new winter day-pack, a few new sets of ski socks, etc, etc… But most important of all: the arsenal of skis must be ready to handle any imaginable set of conditions (and maybe even some unimaginable conditions). A year or so ago, after I realized that my K2 Shuksan AT skis fell apart (under the rigors of being owned by me), I impulsively bought a pair of Head Monster 95s – an ultralight backcountry touring ski with a real propensity for powder. When they showed up at my apartment I instantly realized that they had no application in this part of the world, put them in the corner and got a pair of more well mannered Black Diamond Havocs – something I could probably work with inbounds, in the woods, the side country and the New England backcountry. I had my Marker Dukes bolted on and was ready to go.
However this year, I’ve set my sights a bit higher. With strong ambitions of doing not only as much backcountry skiing as possible but as much powder skiing as possible, I decided it was time to round out the quiver by mounting the Monsters. The advent of Quiver Killers has eliminated the need to more than one pair of touring binding, which previously was the major barrier to entry for building a truly well rounded quiver of skis.
 |
| Heel piece pulled off revealing the inserts. (Click these to zoom.) |
For those who are still in the dark about this revolutionary (and remarkably simple) new technology, here’s the run down. The general rule of thumb regarding mounting skis is that you can only drill into a given pair 3 times before all the holes in the ski have begun to compromise it’s structural integrity. They’ll be weakened, won’t flex correctly, and won’t hold a binding as well. This essentially meant that each pair of skis needed its own dedicated pair of bindings – hot swapping was out of the question. Now, with quiver killers installed, you can readily move one pair of bindings between skis. The Quiver Killer Insert is a small metal fitting that is sunk into the ski and has machined threads inside it’s hollow center. It allows you to easily, quickly and without causing any damage to the ski, screw, unscrew and re-screw to your hearts content a set of bindings and place them on any other pair of skis with inserts. The process if moderately involved and costs a few bucks, but saving nearly 400 bucks is worth the afternoon that it takes if you plan to ski lots of varied terrain. Below is a discussion of the installation process.
 |
| Eye candy just to get you fired up about the long, dry read ahead. |
For starters, there are essentially two scenarios to consider going into the installation. The first, and easiest situation is that you have a pair of skis with bindings already mounted which you’d like to refit with Quiver Killers. This is easy because you don’t have measure all of the spots that need to be drilled. You just bore out the original holes, and set the inserts into them (more detail to follow). The second and semi-complicated situation is that you have a brand new pair of skis which have never had bindings or you have a pair of skis that had some different pair of bindings – in either case you need to carefully get the drill points measured out and marked otherwise your bindings wont screw onto your skis.
The first pair I tried to install were my Head Monsters which I completely botched. Dismayed, I turned to the BD Havocs which were pre-drilled from when I had REI mount my Dukes on them. This worked out much better, and with new found confidence, I patched up the Monsters and took a second stab at them this past weekend.
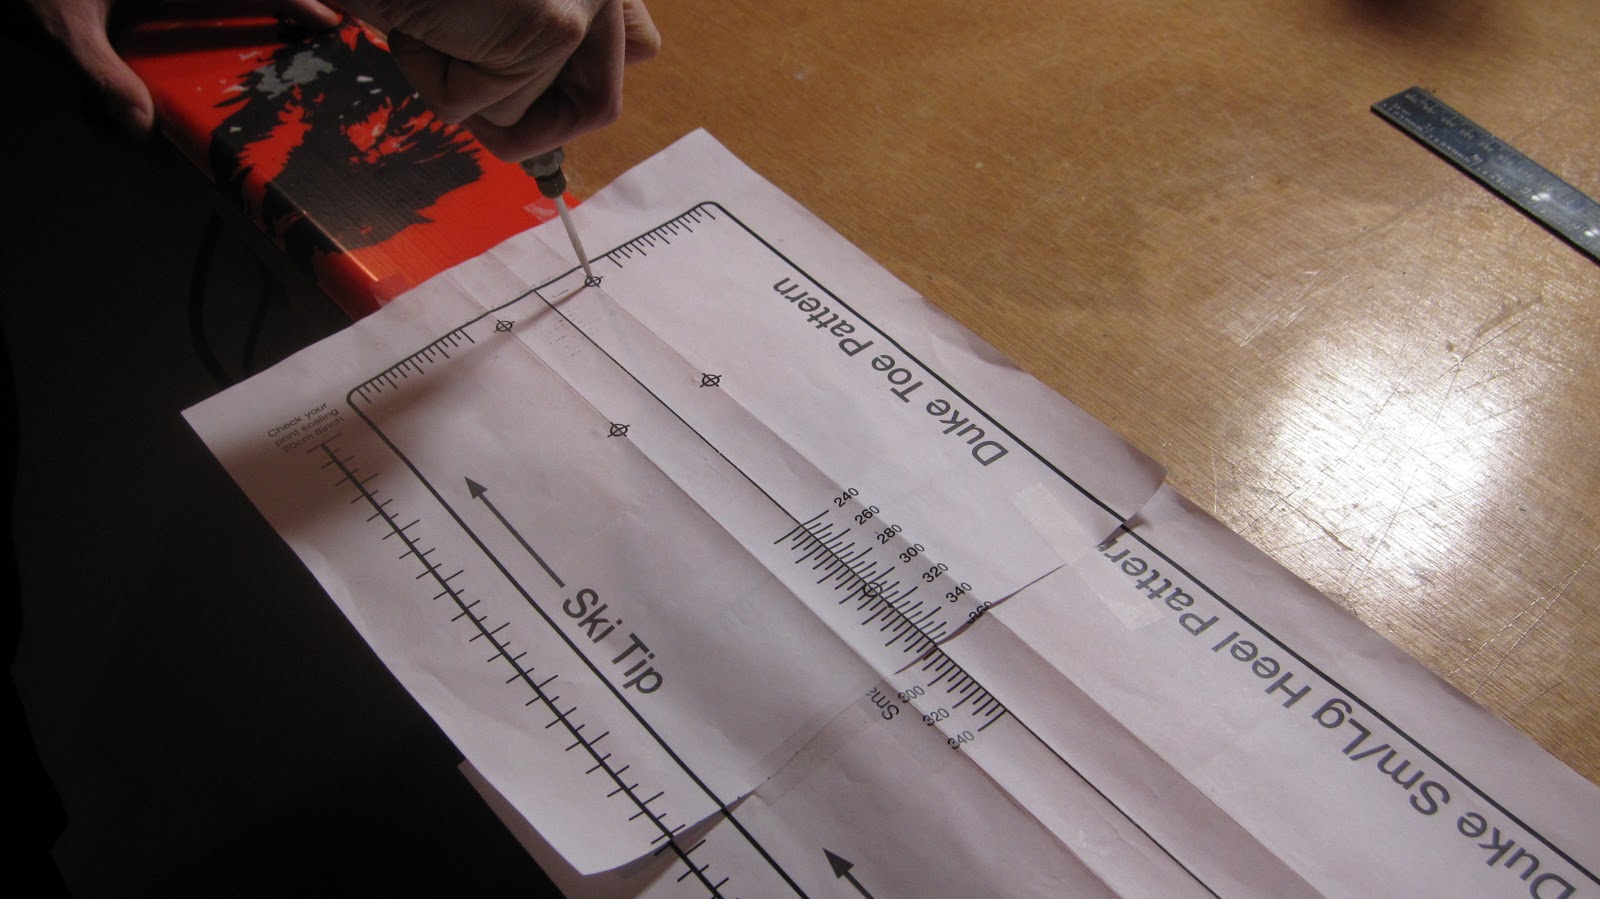
The first order of business is to pull the Dukes off of the Havocs. This is done with a number 2 Phillips screw driver. Next, you’ll want to set up a template to aid you in the drilling process. If you have the original that came from the factory use it!!! The Quiver Killer website provides a few common templates, however since it will be longer than 11″ it comes on two sheets of paper. You must be meticulous in splicing these two sheets together. This also means that you must be sure your printer scaling is correct. It seems that mine may not have been. Alternatively, maybe the template on the Quiver Killer site was wrong. In any event double, triple, and quadruple check your template using something of known validity! I used my Havocs as a guide and penciled in a few micro adjustments.
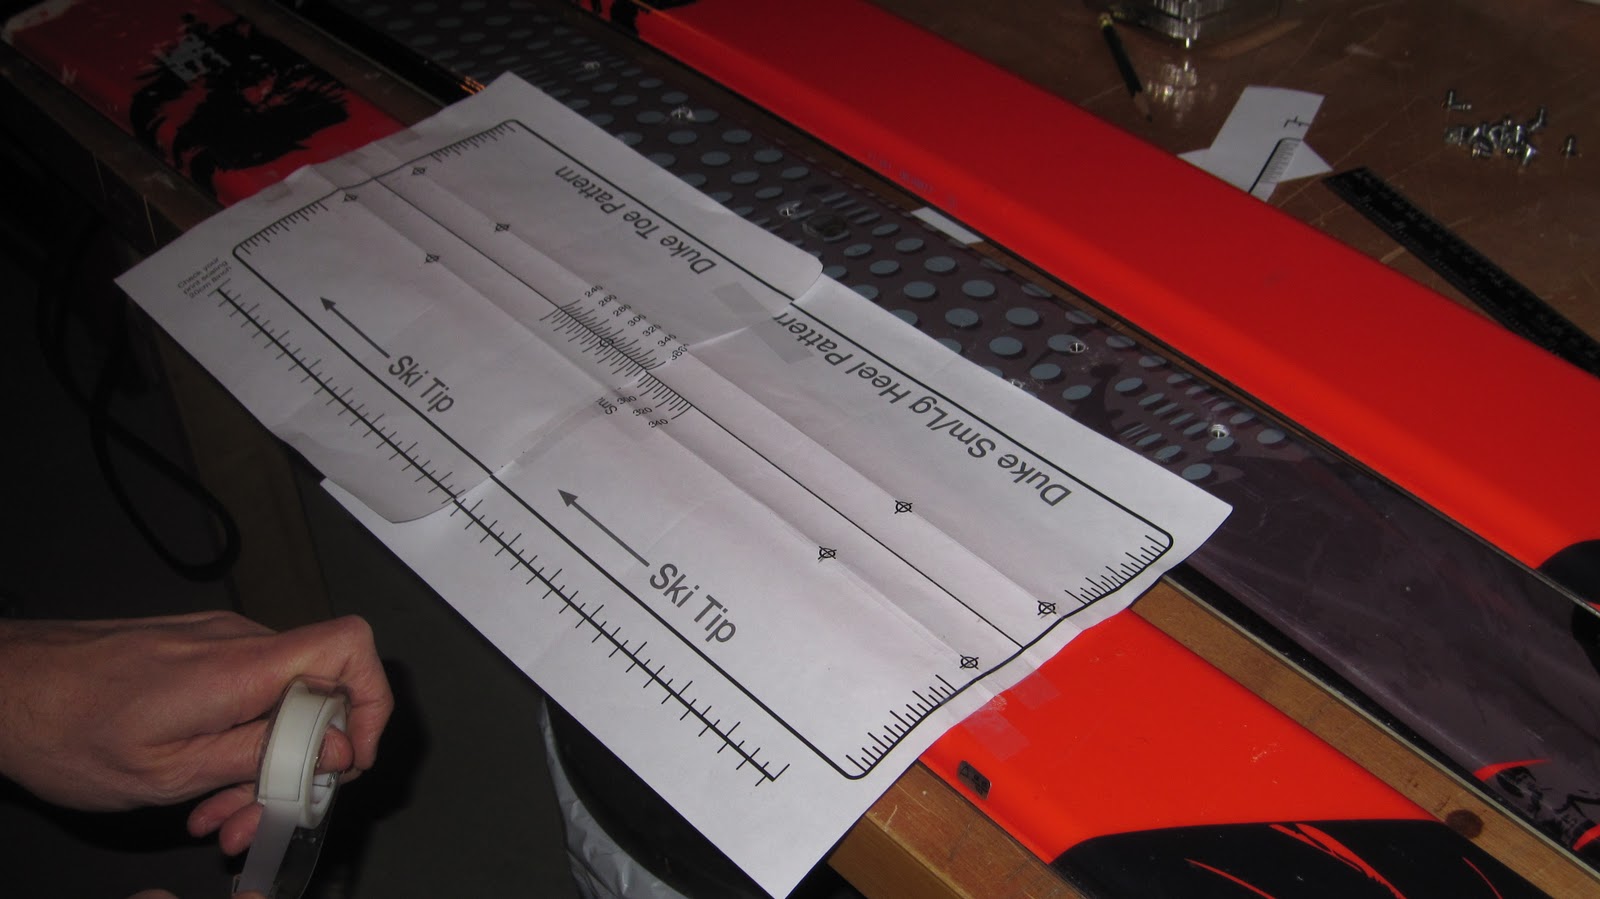 |
| Measure twice, cut once, says my wizened Dad. |
Next you’ll want to tape the template to the topsheet of the ski that you intend to drill. You should verify that the factory center line printed on your skis is indeed accurate, or at least in the same spot on each ski. Once you are satisfied with center (or 3cm aft in my case, since I was aiming to create a powder slaying beast), use a razor blade, or other pointy instrument to score the topsheet so that won’t loose your center. Next you should find the center of the template. This is slightly arbitrary since sole length and shell size aren’t really related – the main point is that you identify something pretty close to center and do the same thing on the other ski! By poking a hole in the template with a nail set (or other pointy implement) you can line up the template center with your ski center.
 |
| Use something pointy to mark true center – pencil and ink will smudge on a smooth topsheet. |
Now that the two ‘centers’ are lined up you need to be sure that you center the toe and heel areas of the template. An accurate way of doing this is by finding the center of the ski at some point fore or aft of the template. Mark this point. Now, place a ruler on top of the template flush with the nail set and the center mark you just found fore or aft of the template. Pivot the template around the nail set until the template center line falls directly under the ruler. Whilst holding your breath (and ideally, causing your hear to temporarily stop beating) tape the the whole thing to the ski. Using a sharp nail set, create little depressions in the topsheet at each of the drill points. This allows you to reuse the template and is better than ink or pencil which will smudge as you work. You can now remove the template from the ski and set up your drill press.
 |
| Center lines and mount points marked using a razor and nail set. |
This is probably the most complicated part of the entire operation simply because it seemed like a no brainer – it was anything but. This may be specific to the skis I was working with, however the topsheet of the head monster is so resilient and resinous that the drill bit, even while attached to a press, would walk a bit before it totally penetrated. All of the drill points would be slightly askew (in the same direction, albeit not where I wanted them to wind up). I found that the solution was to cut away the topsheet around the drill points using an exacto knife with a semi-circular blade. Basically you scoop out a little divot so that the bit can’t walk away from the target before it starts to bite into the core material. I have no idea how they deal with this in ski shops, but I’d love to know because this was by far the most labor intensive part of the whole project.
 |
| All is not lost, they can be fixed to some degree. This, of course, was after Dad explained to me the principle of ‘measure twice, cut once’ but before he reminded me of it… |
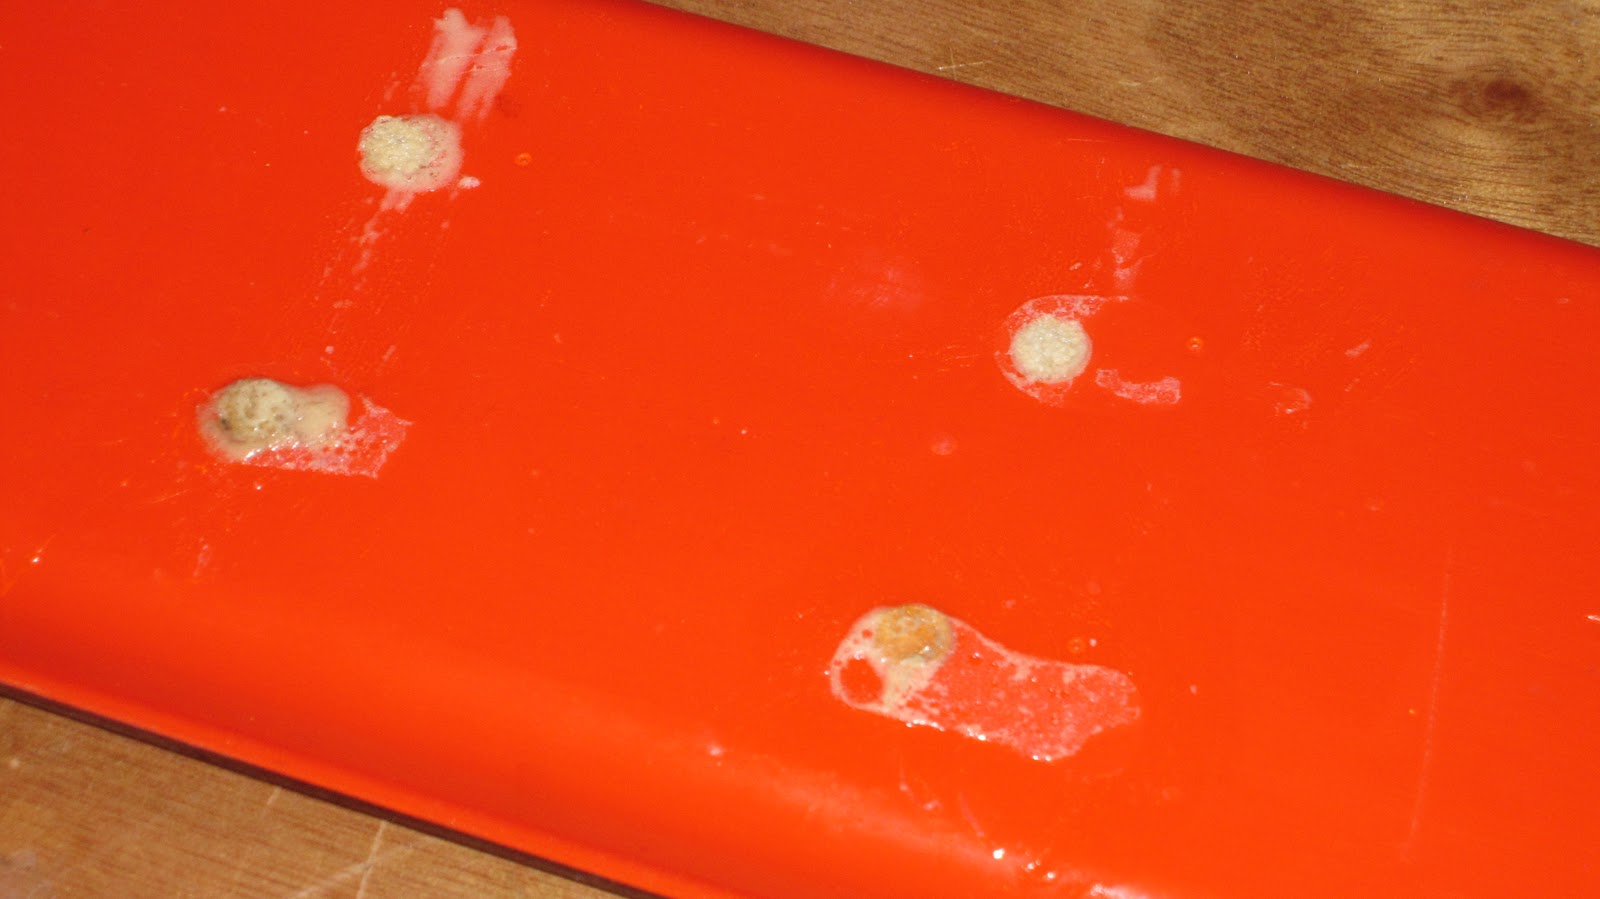
Now seems to be a good time to mention the disaster recover strategy. If, like me, you mangled your skis on your first attempt, you can fix them. My solution was to fill the bad drill points with a quarter inch dowel and Gorilla Glue. If any of the dowels should pop out, you can stuff a bunch of steel wool into them to take up the space and create a bunch of surface area to aid in bonding.
After this is accomplished you can bore out the drill points using a quarter inch bit and a stop collar set just a tad deeper than the height of an insert. Remember you want the insert to be flush with the ski or a tad depressed, and you’ll be sticking a big glob of epoxy into the whole before you finish.
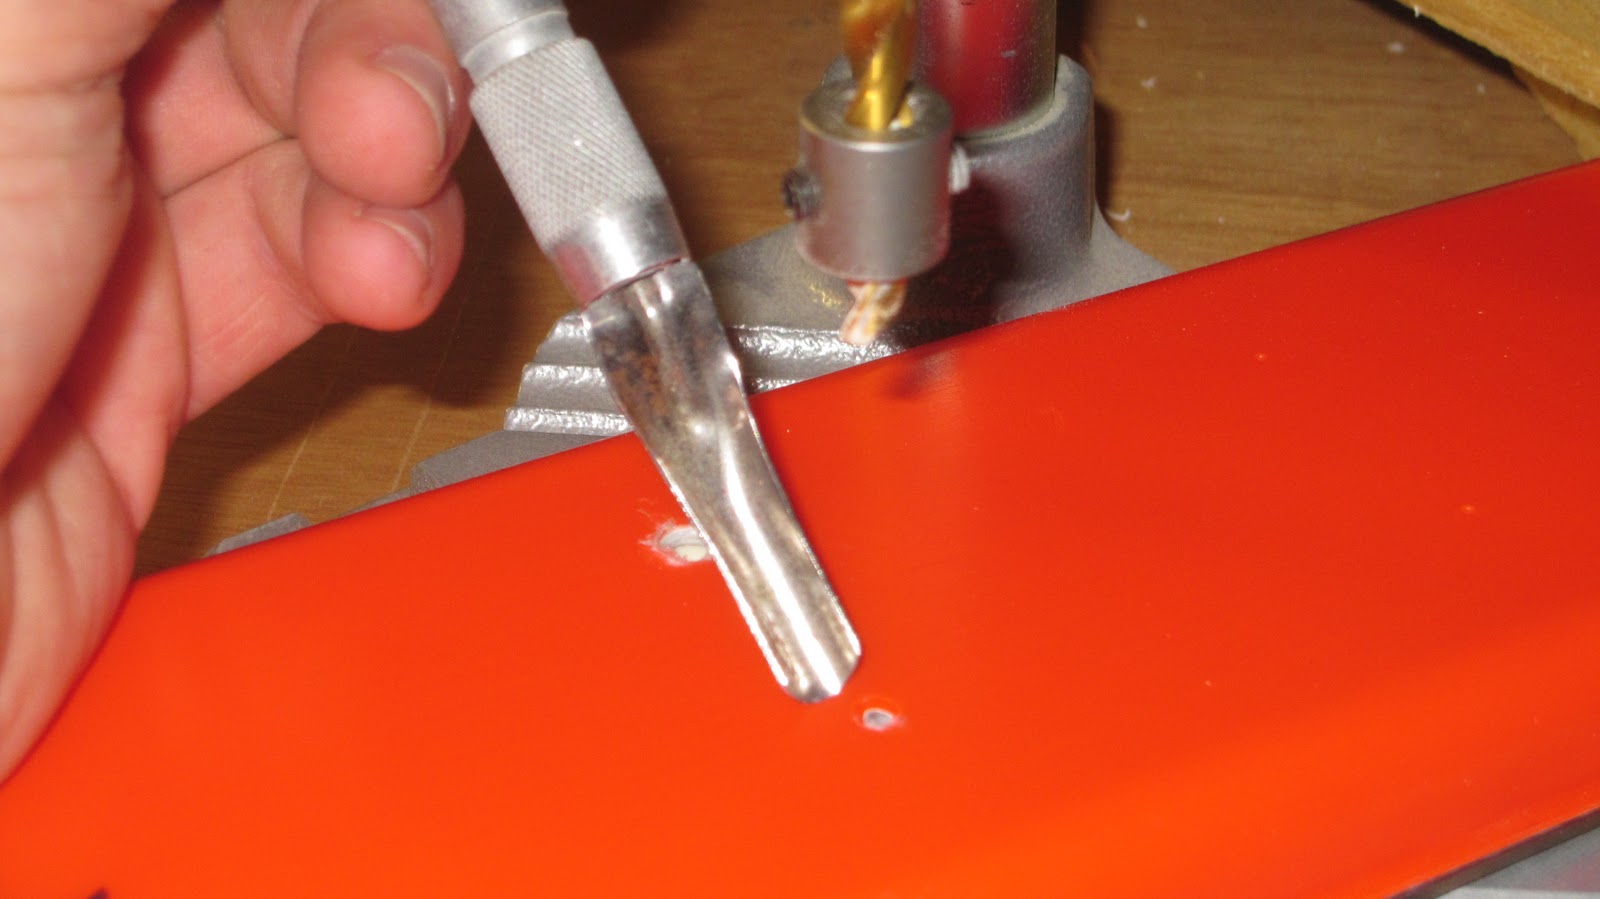 |
| 1/4″ bit, stop collar, and some fortunate Exacto blade. |
Once you’ve bored out all of the holes you need to tap them so that the outer threads of the inserts have something to hang onto. This is done with a 5/16″ bottom tap. Be sure not to crank down too hard or you’ll start to poke into the P-Tex.
 |
| Bottom tap and tap handle. Try to aim straight down! |
 |
| Setting an insert. |
 |
| Finished insert. |
 |
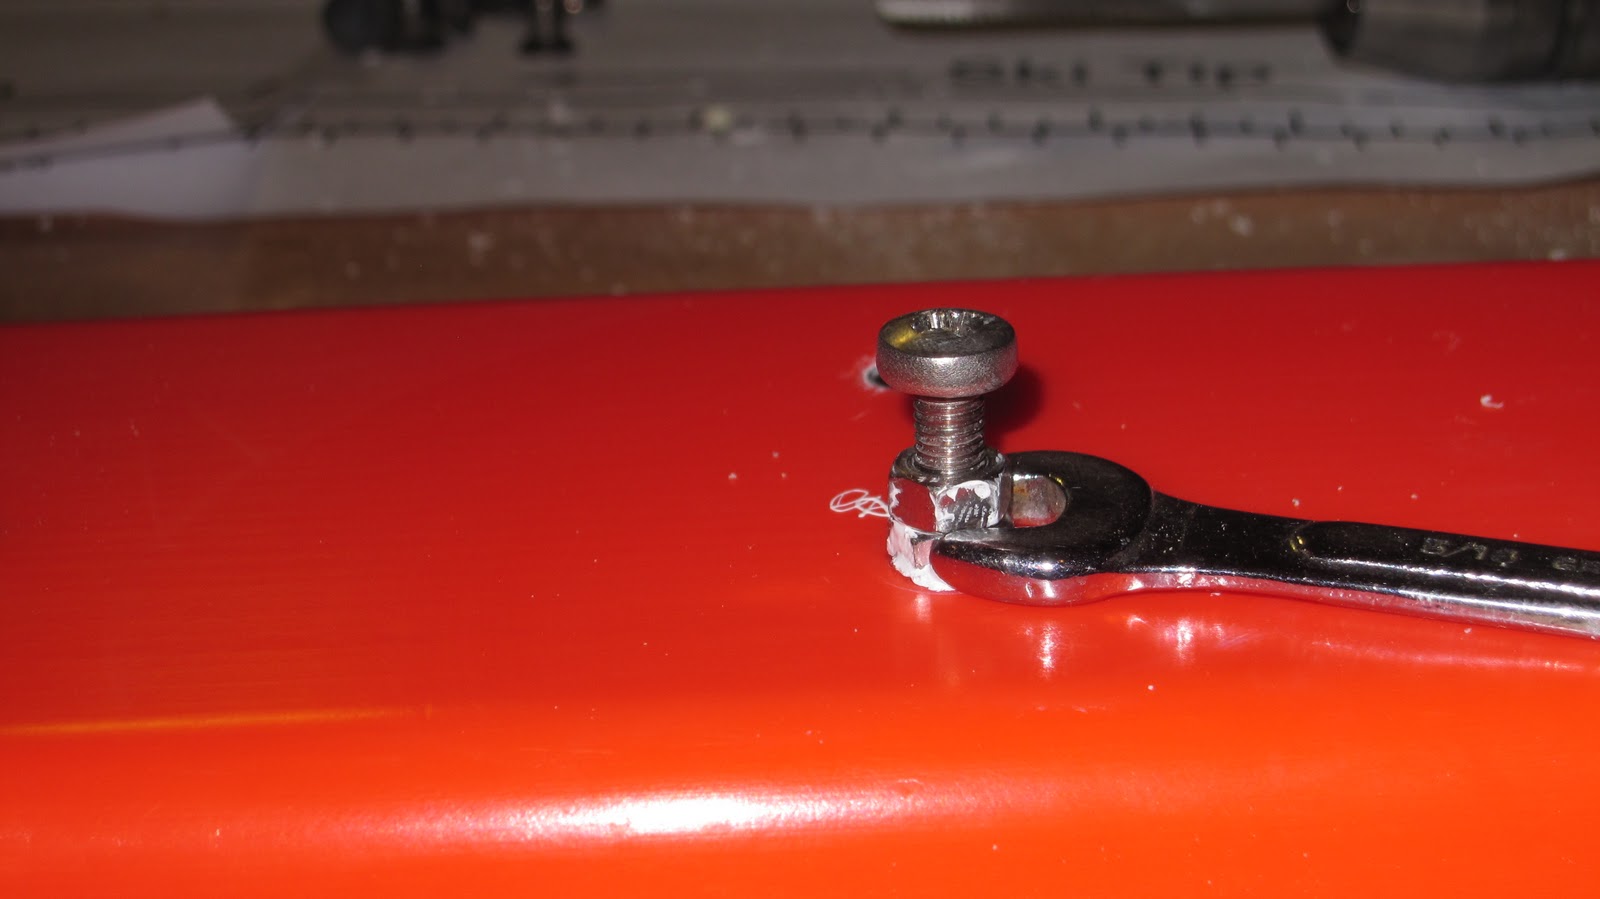
| Victory! |
Once all of the holes are tapped you can begin to set the inserts. Be sure that the inserts are free of any machining oils by bathing them in rubbing alcohol. Next shoot a dollop of 24 hour epoxy into the hole. The main point of the epoxy, beyond fastening the insert is to waterproof the core of the ski. The Quiver Killers come with a special ‘installation tool.’ The installation tool consists of an inch long M5 bold with two hex nuts on the bottom. Twist an insert onto the bottom of the M5 bold and lower the two hex nuts so that all three pieces are in contact. The friction will cause the entire assembly to be a static unit. You can then use a number 2 Phillips head screw driver to set the Quiver Killer into the hole. The bottom hex nut will act as a guide stopping the insert once it’s in place. Using an opened ended hex wrench, back the two nuts away from the insert, relieving the friction. You can then back the M5 bolt out of the insert without taking the insert with you. Using a paper towel with some rubbing alcohol (or similar) wipe away any excess epoxy. Do this like a million or so more times and BAM, you’re done! Go ahead and plop your bindings over your new inserts and crank the M5 screws into your skis.
Gear List (click links for more product info):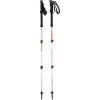
With the winter fast approaching I’ve been more or less hell-bent on getting in as much hiking and other physical activity as possible. With that in mind a short, steep, late fall hike with some superfluous gear in my pack seemed like just the ticket to get me warmed up for winter. This time I went with Mike, a veteran 4 season hiker and old friend. We met at the Lafayette Place Campground ( a primitive tent site) at 10 AM. We were on the trail just a few minutes later.
View Cannon in a larger map
 |
| Pretty serious business… Photo credit: Mike. |
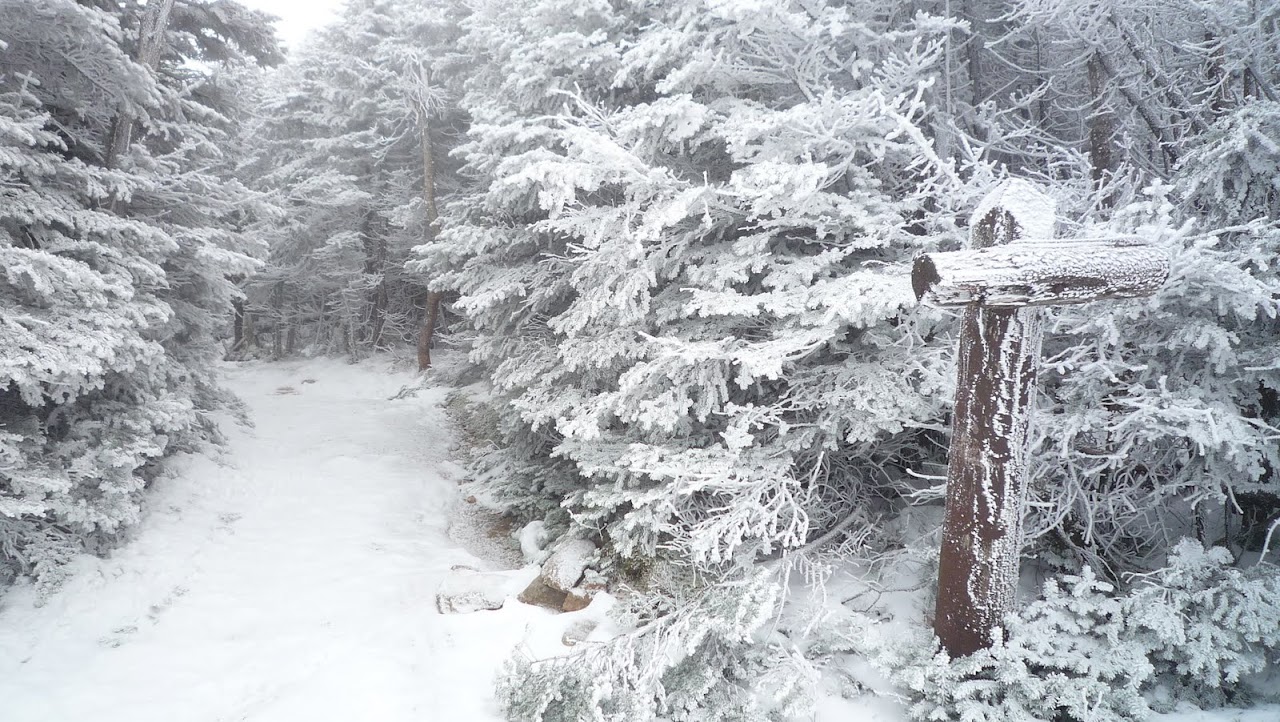
I’ve hiked Cannon several times in the past, but it’s unique terrain, steep ascent and variety of routes up and down make worth the repeat visits, especially as the seasons change. Despite the forecast of ‘partly cloudy’ it as entirely cloudy in Franconia Notch. At face value this is disappointing, but I’ve found that such weather, while nixing the view, really puts an emphasis on the remote, forbidding and exciting nature of the mountains. Also, at this time of year it can create rime ice over nearly every surface – really cool looking.
The trail leads right out of the parking lot and ascends steeply up the southeastern flank of Cannon Mountain. It’s a short distance as the crow flies, but it’s steep enough to mandate switchbacks and can be slow going. As we gain elevation the air cools and the foliage becomes more and more encrusted in ice.
View Cannon in a larger map
 |
| The way to Lonesome Lake. |
Eventually we begin to find that even the well traveled trail is holding onto a dusting of snow. With the rain and fog experienced earlier during the week I thought that any snow would have since melted, but the temps were hovering around freezing and the beginnings of solid snow pack were forming on the top of the mountain!
 |
| The Rim Trail. Photo credit: Mike |
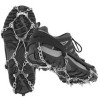
By the time we summit, the everything around us is coated in a layer of rime ice or snow. We use our crampons for extra traction, although micro-spikes would have been the most appropriate tool for the conditions – without deep snow or ice, the teeth are slightly too aggressive for comfort.
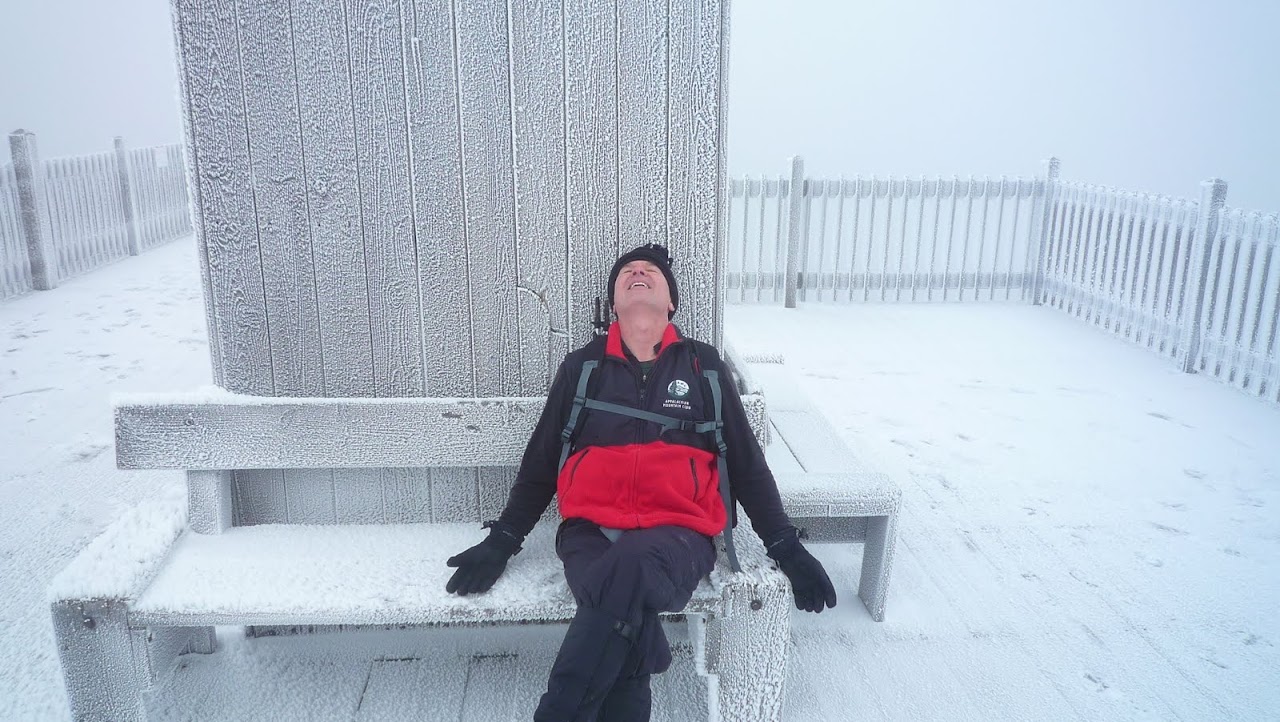 |
| Enjoying the weather on the observation deck. |
Along the way down we encounter a couple working their way through New Hampshire’s 4000 Footers and they join us for the hike down. To our surprise, the south and west aspects of the mountains actually hold quite a bit of snow and the crampons turn out to be really helpful. As we descend the cloud cover breaks from time to giving us great glimpses of Franconia Ridge to the east and Cannon Mountain to the north.
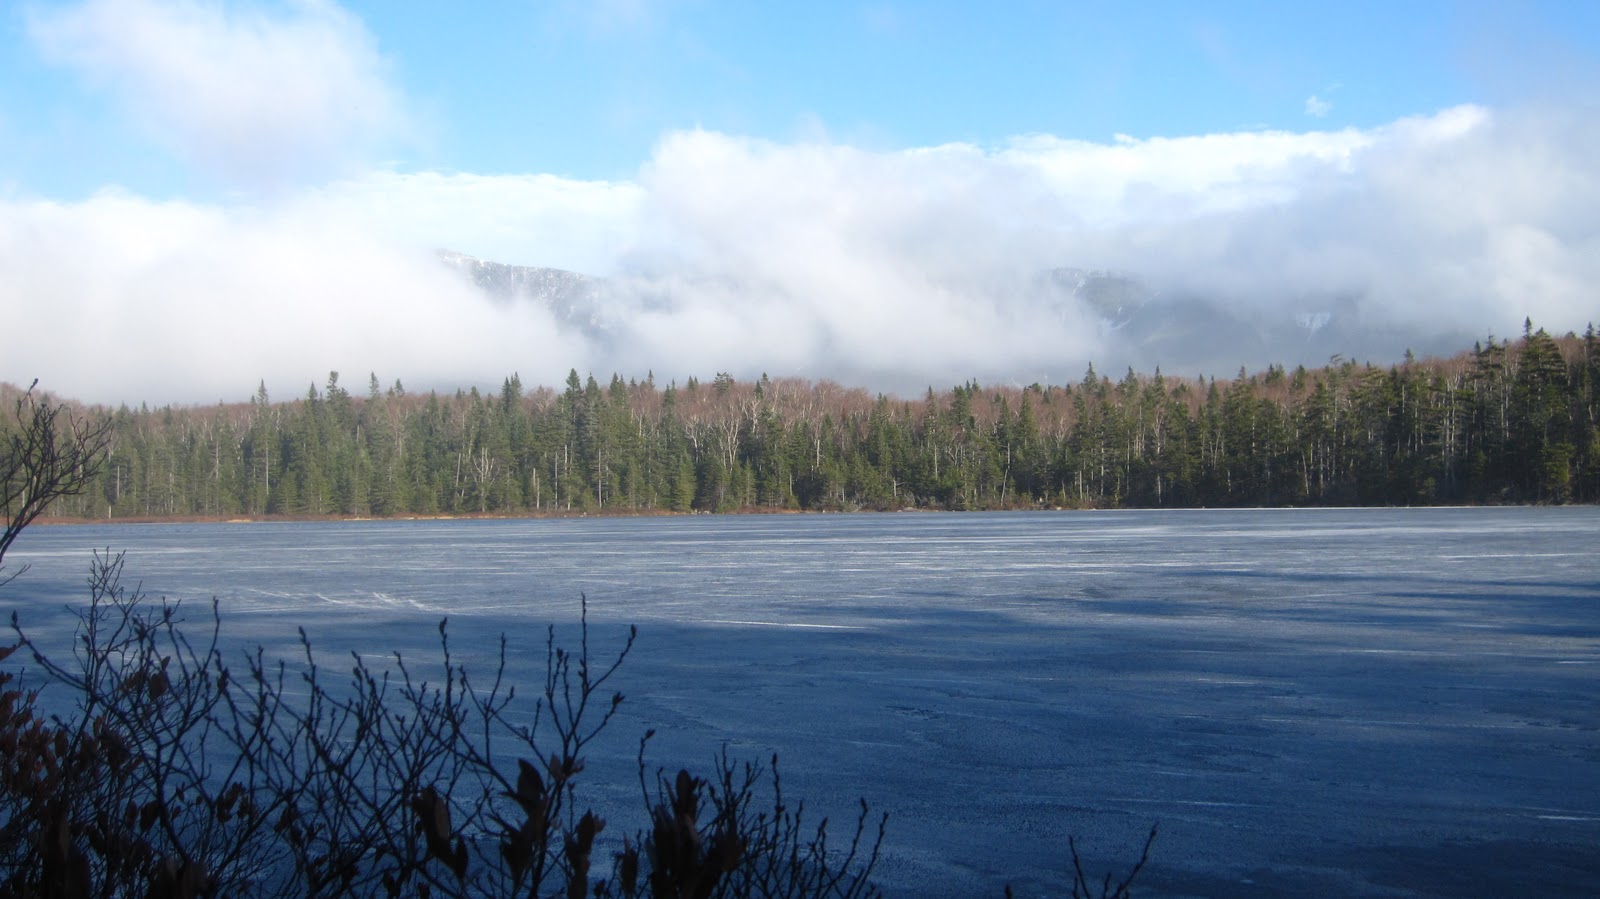 |
| Lonesome Lake with a glimpse of the ridge! |
We pass Lonesome Lake under sunny snow-showers and watch snow eddies blow across the most frozen lake. After a brief rest in the Lonesome Lake Shelter we cruise down the remaining 1.5 miles back to the cars. It’s a relative short hike, but the constantly changing conditions make it rewarding.
Gear List (click links for more product info):