Category Archives: Gear

Vantage Camping

To escape the Seattle area weather, it was time for some winter camping! Also, it was Atlas’ first camping experience, and thus the first time he has made it on the site. Last September Catherine and I got Atlas as an eight week old German Shorthair Pointer puppy! Now he’s old enough to come with us on some adventures.

Dylan, Catherine, Atlas and I loaded up and headed out just before a huge rainstorm hit, and absconded to the desert of Vantage for camping, hiking, and maybe some bouldering. It was cold, hovering around freezing, but not terribly cold for winter camping.
Travels-02887

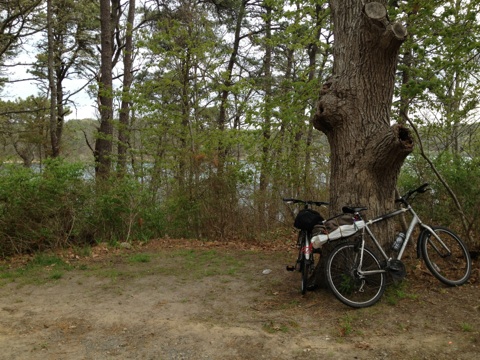
After unpacking, we cooked up some food and got Atlas used to the idea of sleeping on his bed on a rock. Cue photo montage.

The Feathers

Views of the Feathers across the way, and an empty camping area

Travels-02890 Travels-02893 Travels-02894 Travels-02898 Travels-02899 Travels-02901 Travels-02904

Travels-02906

Dylan and Atlas wait for us to catch up

Travels-02910 Travels-02912 Travels-02924 Travels-02917 Travels-02928

That night, Atlas stayed with us in the tent and slept through the whole night! Luckily we’d brought his own personal down blanket because his short hair left him shivering without it.

The next day Atlas, Dylan and I got up early to revisit some cool spots by the Sunshine Wall. First Atlas had to make it through the crevice, though, which involved a puppy hand off.
Processed with VSCOcam with a4 preset

Afterwards we walked along the base of the cliffs and above the talus field. I’m not sure if Atlas would’ve ventured down onto the Talus, but we kept him on the lease just in case.

Processed with VSCOcam with kk1 preset

We inspected some new routes and scrambled our way out, which required some overhead puppy presses. Atlas was apprehensive, but still lead the way back.

TravelsPhone-091822
Processed with VSCOcam with a5 preset
TravelsPhone-094414


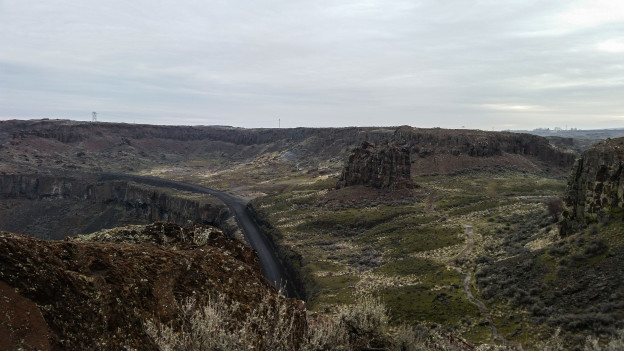
By the afternoon, we decided we’d enjoyed the quiet but had enough of standing around in the cold. We packed up and headed out, but not before driving down the road to check out a view of the Columbia river.


Travels-02929

Travels-02930

Travels-02936


All in all, Atlas’ fist trip went great! We know he’ll be ready for some hikes come this summer.

Winter Readiness: Preventive Epoxy

There’s already snow on the peaks here in Seattle, but I’ve been biding my time getting to know the area so far, aka watching ski flicks.  From all accounts it seems there’s a least a month or more until ski areas open, though I’m sure there are backcountry turns to be found.

My first order of business is to take some preventive measures.  During my last day touring this year, my Blizzard Bonafides caught some air, resulting in a ski-to-rock collision. It skied fine the rest of the day, but I’m concerned the damage could lead to a delam or damage the core.

Ski Epoxy - 6

Damaged tip, with a tiny bit of core showing.

The plan is to clean up and seal the tip with epoxy-but what type to use?  Luckily the TGR forums had some handy previous discussion, if you read around the flaming.  I chose JB Weld, a slow 24-hr setting steel based epoxy.  Apparently it used to boast claims of holding together 10-ton tractor axles, and has been used for radiator crack welds.

Ski Epoxy - 4

Mixing it up. I added slightly more resin after this, and perhaps had a little less hardener than resin. Overall it was easy to work with.  If you’re going to mess up, I hear it’s better to have a bit more resin, than not enough, which can cause a more brittle bond.

Sealing up the ski was easy enough, though I almost wish the epoxy cured faster so it held a better form.

Ski Epoxy - 1

I wanted to apply as little as possible to properly seal off the core, without adding too much weight to the tip. Once applied, I set the ski aside for a day.

13 - 1(1)1

Once dry, I did a pass each of rough and smooth grit sanding, to clean it up and remove some excess.

13 - 1(1)

Lastly, I colored the work, so it’d look like base material.


Go Outdoors, Whatever the Weather May Bring

Catherine:  Back in early May, despite the weather reports, Andrew and I decided that we would go through with our plan to bike and camp the Cape Cod Rail Trail; a 26-mile route that goes from Dennis to Wellfleet. The weather didn’t lie, and it rained a lot, although we had pretty good luck with timing. We were able to set up our tent site at Nickerson State Park right before it downpoured. But then it basically rained the entire rest of our trip – stopping, of course, as soon as we reached the car Sunday morning.

IMG_0756

Our campsite arrival

IMG_0812

IMG_0760

After setting up our site


IMG_0766

Reaching Coast Guard beach


IMG_0776

IMG_0777

Andrew’s fire starting skills were tested in the rain, and he passed.

IMG_0784

Andrew: Biking in and out of Nickerson was the hilliest part, but after we diverged from the rail trail and headed for Coast Guard beach was when it really turned into an adventure.  The winds picked up and threatened to blow us over.

We met up with some of Catherine’s friends in the evening who were kind enough to provide us with comfort foods: delicious snacks and beers.

All in all a great weekend, despite the rain.

Glitch in the Matrix

When one of your adventuring vehicles has problems, you have several options. In the interest of saving money for an upcoming Seattle/Portland trip, Catherine and I opted for the do-it-yourself discbrake/rotor repair.

We bought the parts, and with the right Autozone tool rentals, got the job done without too much trouble. To give a quick run down:

CameraZOOM-20130330152725447

Catherine loosens the tires.

CameraZOOM-20130330151634631

Jack the car up. Chock the wheels. Put it in neutral. Read the manual for this one since I wasn’t familiar with Catherine’s car.

photo 1

Me unbolting the caliper after removing a tire. Remove the worn pads. If the rotor shows signs of improper wear (It shouldn’t), replace it.

photo 5

Compress the brake caliper. For rear brake calipers that require a twist to compress, rent the tool from Autozone. You did rent it right?


photo 2

Compressing the front caliper with a C clamp


photo 3

Unusual wear from only the driver’s side rear pads, which tore up the rotor.

CameraZOOM-20130504145749258

To replace the rotor, unbolt the caliper bracket, and then use a bolt from the caliper screwed into the rotor to pop it off the axle. Then seat the new (cleaned) rotor, and re-assemble. Before you replace rotors, make sure to clean the new ones.

photo 4

Secure new pads into the bracket, and apply sound dampener (the orange glue). Re-attach the caliper, and then put the wheel back on, tightening the bolts evenly to 100 foot lbs.

The first try it took us a second trip to Autozone to acquire the brake tool, and we ran out of time. Our second attempt, while doing the rear wheels, went incredibly smoothly, especially considering there is no Haynes manual for her car. Working with someone else on a job like this helps as well.