I took today to do two mini-projects and ready myself for the rest of ski season that’s to come. The first was to cut my new climbing skins down to fit my Atomic 180 Helidaddys. The second was to waterproof and seal a pair of leather gloves I bought.
I did get some skiing in yesterday, however, up at Wildcat. They’d gotten 8″ inches Friday, so I headed up with my Dad before he went back overseas, and met up with Rob and an assortment of other skiers who came out of the woodwork.
Now, onto the projects:
Climbing Skin Trimming
Black diamond actually has a great how-to video on trimming, but I figured it might be useful do a brief write up since this is the first pair of skins I’ve trimmed. The video details almost everything I cover below. I bought the 125m Black Diamond Nylon STS skins. My basic reasoning for this was that I’ve been borrowing a used pair of Nylon STD skins with a clipfix tail clip from Sweeney, and it seemed like I just needed more coverage under my skis. The 125mm would totally cover my Atomics since their dimensions are 126-99-117. The STS skins also seemed to be the most utilitarian.
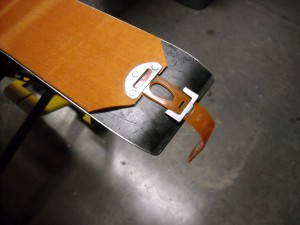
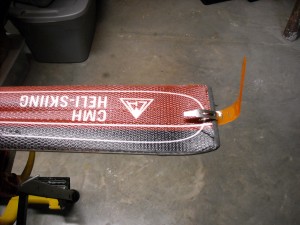
The basic process is, clip the skin to the tail, lay it onto the skin from tail to tip, and then start measuring. A quick note here, it seemed like it should be obvious how to attach the tail clip, but I had to pause and mess with it for a few minutes. I’d seen Rob use the clips, held a correctly attached one before, and had the diagrams on the skin instructions in front of me…but it wasn’t immediately clear. The images on the BD instructions don’t accurately display how to attach the metal clip to the strap. In lieu of this, here’s several photos.
You’ll notice that I have the clip in the 2nd position, rather than the 4th that Black Diamond recommends. Part of this is that I cut the skin a little long and had already attached the tip piece, but also I figure I want these skins to be able to potentially fit a ski with similar sidecut but with a length of 185.
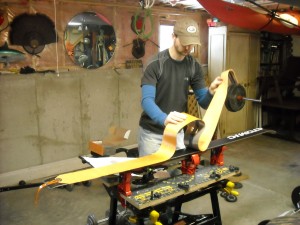
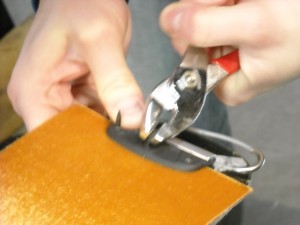
After you lay out the skin, measure where the tip piece will meet the skin, mark it with a sharpie and ruler, and cut the skin. Then align the tip loop and screw it in. Use pliers to remove the screw that sticks through.
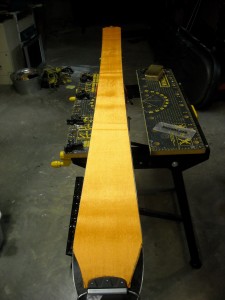
At this point, remove the skin and re-apply it from tip to tail. It should be under a bit of tension. BD recommends cutting excess skin at the tip, by marking angular lines from both sides of tip loop to where the skin would meet the snow, and removing the excess. Their included tool makes the cutting fairly easy.
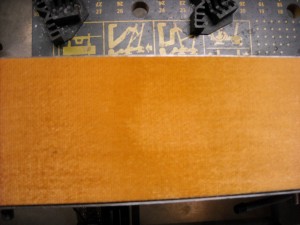
Here’s where the “measure twice, cut once” part comes in. With the skin fairly centered on the ski, cut one side along the sidecut.
Then remove the skin and re-align it so the side you just cut has 2mm of edge showing. This is so when you’re skinning you can still use your edges. Make the second cut.
Repeat for the second ski and that’s it! I’m hoping this will resolve the slipping problems I’ve had on steeps compared to skinning with properly cut skins.
Glove waterproofing
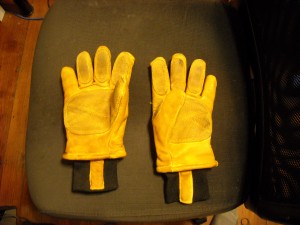
I’ve had a bit of trouble with gloves recently since it’s been so damn cold on the mountain. I just bought a super warm pair of mitts for cold days, but I want to make this all-leather pair my every day glove for the slopes. I wore these at Wildcat when it was ~25 degrees Fahrenheit without issue, but they got very damp on the outside by the end of the day.
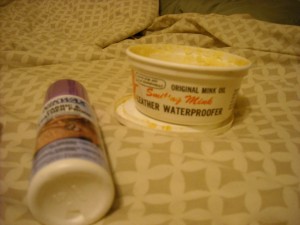
The procedure was, heat the gloves in the oven on warm until they heat up. Then apply mink oil, and put them back in the oven to let them soak in. Take the gloves out after 5 minutes or so and let cool. Then apply Nikwax waterproofing.
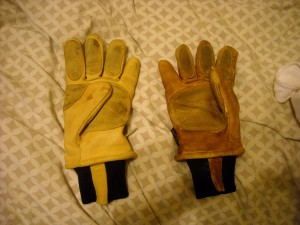
Left glove, with no mink oil, vs. the right glove after oiling. I went back and oiled the few bits around the thumb and cuff that I'd missed.
The mink oil darkened the leather and made it a bit softer. The Nikwax was spray on and seems to have soaked in without affecting the glove texture much.

Nice dude, I was hoping the glove conditioning steps were written down somewhere.
Nice post! The BD instructions are really helpful except about how to attach the tail connector… You proved I was doing it the hard way (backwards)! Thanks for the info.
Thanks Tom, I’m glad you found it useful!
Like Tom, I put the tail clip on wrong after puzzling over the BD instructions. So I thank you too for this tip and the photos..