And now for the real story behind Castle Peak: planning, route-finding and all! Perhaps surprisingly given how long it all is, the video does not really show a good hunk of the hike. Nor does it really give much beta, which could be useful down the road. There were also a few cool pictures which didn’t make it into the video – it was just getting too long. So here goes…
We’ll start with planning. It’s right by Aspen – we had the good fortune to stay with Kelly’s cousin in Marble which is close-ish. Maybe it wasn’t close, but it was manageable. We were on the trail some time past 7AM – not bad for us. We’ve been getting our 14er intel from 14ers.com which has to be applauded for it’s exceptional organization and thoroughness, though there were a few gotchas we ran into along the way. For one, the start of the hike was unclear. 14ers.com explains that the trail begins at the end of Castle Creek Road where the road becomes a 4×4 trail and turns into Montezuma Road. Depending on what map you are looking at, this road seems to variously be referred to as Montezuma Road, or Peal Pass Road as well. In fact, the road (whatever you may call it) leads to both Montezuma Mine and Pearl Pass Road, so perhaps none of these monikers is too inappropriate. In any event, it turns into a jeep trail pretty obviously – you’ll know when you’re there.
The guide indicates that you can start at the parking area where the pavement ends, or proceed onward to the end of the 4×4 trail to achieve a shorter hike. The GPX file on 14ers.com had us believing that the jeep road only shaved 2 miles off of either direction. In reality it probably shaves at least 4 miles off of either direction assuming your vehicle can make it the whole way. You most certainly need a 4×4 to make it the entire way. We saw a Subaru outback (with all of it’s passengers and cargo expelled) limping back down the road on a donut as we were on our way up. We heard that a Forester made it the whole way recently. Maybe if your offroad skills are sufficient it can be done, but some decent clearance and 4WD or AWD would seem prudent especially toward the top.
That said, there are numerous places to stop along the way once you determine that you’d like to complete some of the trip under your own power, or that your vehicle is approaching it’s limits. There are numerous dispersed camping sites along the road and plenty of pull-offs for picnicking and camping.
We turned off the jeep road after only about a mile: as we rounded a bend it appeared as though the road was consumed by the creek. In fact, it fords the creek, rounds a sharp bend which we could not see from our angle and proceeds up a decently steep bank. In hind-sight my car would probably have been fine, but we were there for a hike after all, and were content to hike up most of the road. If you drive to the terminus, you are leaving yourself about 4 miles of hiking. If you park where the pavement ends you end up with about 12 miles round trip.
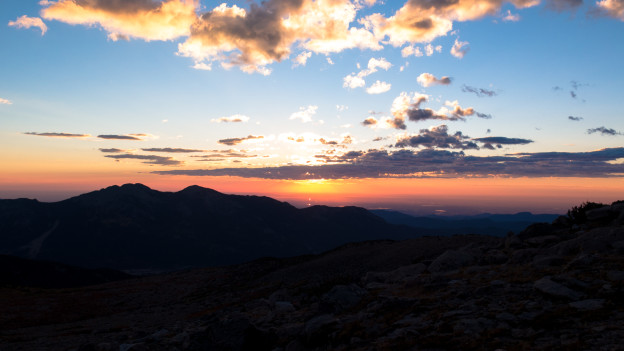
With that in mind, be aware that you are hiking for a solid 8 miles on a road. We usually prefer not to hike on roads but in this case the unimproved nature of the road coupled with the extraordinary beauty of the valley completely overrode any disdain for hiking on roads we may have had.

Stark Beauty: Easily one of the most scenic roads I’ve ever traveled.


From the profile you can see that the first 4 miles is pretty straight forward. The climb follows the road, which presumably was graded for antique trucks to ride up and down, and as such you can maintain an easy pace and make good time.
Once the road ends, the adventure really begins. The path meanders through a miserable shambles of talus and scree with the odd cairn placed here and there. It looks to me as though avalanche activity, runnels and rock slides probably rearrange the surface of the bowl between Castle and Conundrum on a yearly basis. The GPX from 14ers.com while generally accurate, does not necessarily follow the past path through the giant jumble below the summit. I imagine at some point in time, this was fine, but it did not work out well for us. You can see above that we deviated substantially in a few places. In truth, you probably just need to perform your own route-finding based on the conditions when you get there. The map above shows our route vs the 14er.com GPX which deviates slightly in a few places. This is where you may wish to wing it, but be certain to rejoin the beaten path at the top of the ridge.
Eventually, the scree gives way to a fairly beaten knife-edge path which you follow until the summit. At this point it is much more follow-able, there are a few places which made me think twice before proceeding (seen below).
…which provides me with a convenient segue to another of the gotchas: 14ers.com gives this hike a rating of Class 2 and Exposure 3. These ratings seem to overlap a bit and rather than offer my own interpretation I’ll quote:
Class 2
More difficult hiking that may be off-trail. You may also have to put your hands down occasionally to keep your balance. May include easy snow climbs or hiking on talus/scree.
Class 3 (for comparison)
Scrambling or un-roped climbing. You must use your hands most of the time to hold the terrain or find your route. This may be caused by a combination of steepness and extreme terrain (large rocks or steep snow). Some Class 3 routes are better done with rope.
Exposure 3
Moderate exposure along the immediate route. It should be avoidable with some slow hiking or scrambling.
Exposure 4 (for comparison)
More serious exposure that could result in serious injury or death if you fell. Moving past the area will require some scrambling or short technical moves.
The final stretch is a knife edge. While not terribly perilous, it did seem to me that there were a handful of places where a fall would easily ruin your day (and probably week). Some fellow hikers concurred that while mostly accurate, one of the two ratings seemed a bit on the low side for certain isolated sections. I suspect the author did not see fit to bump up the overall rating just for a couple isolated features. Regardless, it’s worth noting that these things exist for those with low appetite for heights and exposure. In the spirit of full disclosure, this only my second 14er so maybe I’m just not used to the mountains in these parts…

Kelly shortly before gaining the ridge.

Foreground: screen knightmare; background: the knife-edge.
Once you get onto the ridge, the real fun begins! The scrambling and route finding were just challenging enough to be rewarding while not being overly stressful. Coupled with the outrageously good views from the top, I took a real sense of satisfaction in summitting this rock pile.


The down climb along the ridge was easier and faster than the climb – probably in part because I had figured it out by then. The descent down the talus slope was about as crappy as the ascent – go figure. Once you get back to the jeep road it’s all cruise control and views!