Tag Archives: gear repair

Winter Readiness: Preventive Epoxy

There’s already snow on the peaks here in Seattle, but I’ve been biding my time getting to know the area so far, aka watching ski flicks.  From all accounts it seems there’s a least a month or more until ski areas open, though I’m sure there are backcountry turns to be found.

My first order of business is to take some preventive measures.  During my last day touring this year, my Blizzard Bonafides caught some air, resulting in a ski-to-rock collision. It skied fine the rest of the day, but I’m concerned the damage could lead to a delam or damage the core.

Ski Epoxy - 6

Damaged tip, with a tiny bit of core showing.

The plan is to clean up and seal the tip with epoxy-but what type to use?  Luckily the TGR forums had some handy previous discussion, if you read around the flaming.  I chose JB Weld, a slow 24-hr setting steel based epoxy.  Apparently it used to boast claims of holding together 10-ton tractor axles, and has been used for radiator crack welds.

Ski Epoxy - 4

Mixing it up. I added slightly more resin after this, and perhaps had a little less hardener than resin. Overall it was easy to work with.  If you’re going to mess up, I hear it’s better to have a bit more resin, than not enough, which can cause a more brittle bond.

Sealing up the ski was easy enough, though I almost wish the epoxy cured faster so it held a better form.

Ski Epoxy - 1

I wanted to apply as little as possible to properly seal off the core, without adding too much weight to the tip. Once applied, I set the ski aside for a day.

13 - 1(1)1

Once dry, I did a pass each of rough and smooth grit sanding, to clean it up and remove some excess.

13 - 1(1)

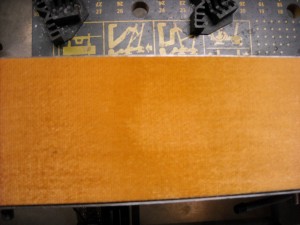
Lastly, I colored the work, so it’d look like base material.


Grep Prep: Swap Plate Mounting

It’s possible you’ve heard of binding swap plates before.  It’s also possible you’ve even mounted swap plates to your skis a number of times.  If so, this might be old hat to you, but personally this is only the third mount I’ve done.

For anyone new to swap plates: swap plates are machined pieces of aluminum that allow you to swap multiple sets of bindings onto a single pair of skis, such as switching between Tech bindings (Dynafits) and in-bounds or side-country bindings.

Disclaimer:  I’ve never mounted plates before, so I thought it would be useful to document my process. I don’t have any background as a ski technician or working in ski shops, but I do want my skis to be set up as exact and perfect as possible, so I was incredibly careful.  It was definitely a measure a whole ton, drill once, situation.

This year I picked up two new pairs of skis: I perhaps optimistically got a pair of used Praxis Powderboards, and a brand new pair of Blizzard Bonafides.  I’m pretty amped up about both pairs, and my initial reaction to the Bonafides is that there’s nothing not to like, though the real test will be when some big storms hit and touring season begins.  I wanted to dial in both setups and be able to swap my pair of Rossignol 10-18 Axial2s between them, while being able to mount Dynafits as well.  Luckily, Binding Freedom came out with DynaLook plates for just this purpose.

Binding Freedom’s plates come with everything needed for mounting except a drill.  The included templates work great for lining everything up.  I used them last year when Rob helped me mount Fritschi’s on my Helidaddys.

Prior to setting up my own skis, I refreshed my memory using Brian’s post about inserting quiver killers.

Mounting Process

Alright, enough rambling.  Here’s the step by step process for mounting plates to your skis properly:

Before beginning: Grab a drill, bits, a posi-driver (#3 philips screw driver), a hammer, something to punch starter holes with, scissors, masking tape, a sharpie/pen, a ruler, clamps, and a sturdy table to clamp to.

Lay the first ski on the table.

1.  Find the center line on the ski, and determine where you want to mount relative to the line.  Center marking on boot on the line is fine in many cases.  Mark it with a sharpie.

2.  Find the center of the center line, to properly line up the center of the paper template.

3. Cut excess paper off the template, and tape it together at the correct BSL.  It’s also a good idea to cut notches near the BSL marking to properly line the center of the template up with the center of the ski.  I also cut a square out of the center of the template to reveal the markings I’d made underneath.

PlateTemplate

Ski with template cut and taped in a roughly correct position. Notice the sharpie marks at the center line, and the hole cut at the center line.

Template close-up

Close-up of the template.

4.  Do lots of measuring.  Make sure that at least each end, and the center is centered on the ski, aka equidistant from the edge.  I used a T-square and made measurements from the center of each hole to the edge.  As you get the template in the correct spot, tape it to the ski with masking tape.

T-square measuring

T-square measuring each hole position.

5.  Center punch each hole.  Mark it if you want for easier location.

6.  Carefully remove the template.  You’ll want to reuse this for the next ski.  You might want to line up the plates on your hole marks after this to ensure you didn’t miss.

7.  Clamp the ski down.

Clamped and ready for drilling.

Marked center punch marks

Marked center punch marks

8.  Tape a stopper on the bit or use a bit with a catch sleeve, so that you don’t drill too deep.  You certainly don’t want to drill all the way through the ski.

Masking tape depth guide based off the screw length.

9. Drill pilot holes, using something lke a 3/32″ bit.  This is especially important for skis with metal so that the bit doesn’t walk over the topsheet.

Toe piece pilot holes drilled.

Toe piece pilot holes drilled.

10.  Re-drill with the larger bit.

11. Grab the plates and mount them.  Use some sort of adhesive such as super glue, just a bit on each screw to hold it in.

Plate with marked punches.

Another look at the plates lined up before drilling.

12. Repeat for the second ski.

Done!

Completed plate mounting!

Completed plate mounting!

I’ve tested the new setup on the hill, and so far I’ve been happy with my efforts.  Everything seems to be holding together well.

Bring on the snow!

Gear Prep: Climbing Skins and Gloves

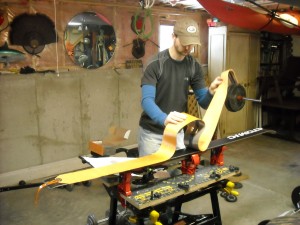
I took today to do two mini-projects and ready myself for the rest of ski season that’s to come.  The first was to cut my new climbing skins down to fit my Atomic 180 Helidaddys.  The second was to waterproof and seal a pair of leather gloves I bought.

I did get some skiing in yesterday, however, up at Wildcat.  They’d gotten 8″ inches Friday, so I headed up with my Dad before he went back overseas, and met up with Rob and an assortment of other skiers who came out of the woodwork.

Now, onto the projects:

Climbing Skin Trimming

Black diamond actually has a great how-to video on trimming, but I figured it might be useful do a brief write up since this is the first pair of skins I’ve trimmed.  The video details almost everything I cover below.  I bought the 125m Black Diamond Nylon STS skins.  My basic reasoning for this was that I’ve been borrowing a used pair of Nylon STD skins with a clipfix tail clip from Sweeney, and it seemed like I just needed more coverage under my skis.  The 125mm would totally cover my Atomics since their dimensions are 126-99-117.  The STS skins also seemed to be the most utilitarian.

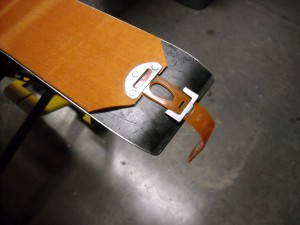
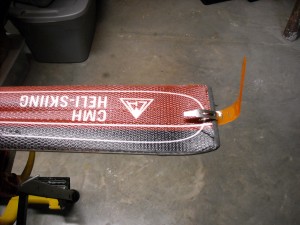
The basic process is, clip the skin to the tail, lay it onto the skin from tail to tip, and then start measuring.  A quick note here, it seemed like it should be obvious how to attach the tail clip, but I had to pause and mess with it for a few minutes.  I’d seen Rob use the clips, held a correctly attached one before, and had the diagrams on the skin instructions in front of me…but it wasn’t immediately clear. The images on the BD instructions don’t accurately display how to attach the metal clip to the strap.  In lieu of this, here’s several photos.

STS tail clip attachment

Top view. You can secure the rubber strap to the metal clip.

You’ll notice that I have the clip in the 2nd position, rather than the 4th that Black Diamond recommends.  Part of this is that I cut the skin a little long and had already attached the tip piece, but also I figure I want these skins to be able to potentially fit a ski with similar sidecut but with a length of 185.

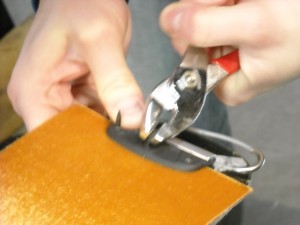
After you lay out the skin, measure where the tip piece will meet the skin, mark it with a sharpie and ruler, and cut the skin.  Then align the tip loop and screw it in.  Use pliers to remove the screw that sticks through.

Removing excess screw from the tip piece attachment with a twist of the pliers

At this point, remove the skin and re-apply it from tip to tail.  It should be under a bit of tension.   BD recommends cutting excess skin at the tip, by marking angular lines from both sides of tip loop to where the skin would meet the snow, and removing the excess.  Their included tool makes the cutting fairly easy.

Here’s where the “measure twice, cut once” part comes in.  With the skin fairly centered on the ski, cut one side along the sidecut.

Removing the excess skin from the edges

Then remove the skin and re-align it so the side you just cut has 2mm of edge showing.  This is so when you’re skinning you can still use your edges. Make the second cut.

Fully cut skin, with edges showing.

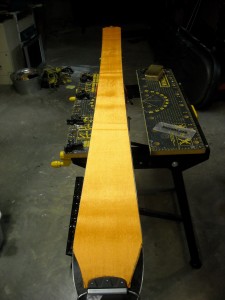
Ready for touring

Repeat for the second ski and that’s it! I’m hoping this will resolve the slipping problems I’ve had on steeps compared to skinning with properly cut skins.

Glove waterproofing

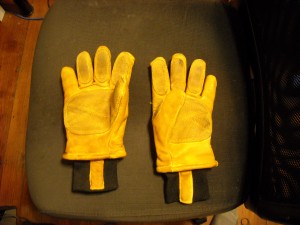
I’ve had a bit of trouble with gloves recently since it’s been so damn cold on the mountain.  I just bought a super warm pair of mitts for cold days, but I want to make this all-leather pair my every day glove for the slopes.  I wore these at Wildcat when it was ~25 degrees Fahrenheit without issue, but they got very damp on the outside by the end of the day.

The procedure was, heat the gloves in the oven on warm until they heat up.  Then apply mink oil, and put them back in the oven to let them soak in.  Take the gloves out after 5 minutes or so and let cool.  Then apply Nikwax waterproofing.

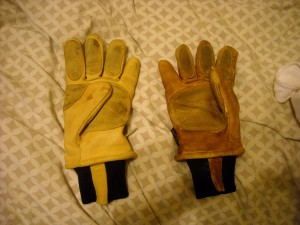
Left glove, with no mink oil, vs. the right glove after oiling. I went back and oiled the few bits around the thumb and cuff that I'd missed.

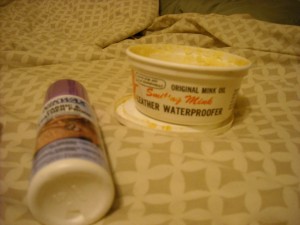
Application products

The finished product

The mink oil darkened the leather and made it a bit softer.  The Nikwax was spray on and seems to have soaked in without affecting the glove texture much.


Bike Repair: Wheel Replacement

Last Tuesday I did a complete swap of the rear wheel on my Trek SU 100.  It took me a little while to throw this short post together because I’ve been distracted meticulously following the upcoming snow storm.

Sometime before the holidays I noticed my rear brakes were rubbing, and it turned out to be a crack on the side of my rear rim.  I blame Boston’s potholes.  I did a little reading and determined I didn’t want to wait for the wheel to “fail catastrophically” despite the fact the crack seemed innocuous enough.  Many bikers had probably had this happen to them, or done this repair, but this is the first time I’ve encountered a cracked rim.

The offending crack.

When I was back in my apartment after the holidays, I went out to REI and bought a new rear wheel, already set-up with a hub and spokes to save the hassle.  I asked the shop to give me a wheel “just to get the job done” since this is mainly a commuter bike.  I figured I could improvise / borrow some tools, but I ended up needing a Cassette Lockring, and a Chain Whip.  Due to my impatience to finish the repair, this involved a second trip to REI for tools.

Derailleur and gears

Some pre-repair pics.

Pretty grimy cassette

The lockring is the black piece that screws into the hub, holding the cassette on the bike.  After watching some videos on youTube for cassette removal, I learned it is fairly easy to strip the lockring, and it makes a loud clicking noise while loosening/tightening it.  When replacing the lockring, it appears you want it a little more than hand-tight, so that there is no play in the gears (they can’t shift at all).

The right tools for the job, complete with degreaser and grease. I also recommend a big wrench.

Since I was about to disassemble the rear gears, I decided to degrease everything, including the derailleur.  The degreasing was by far the messiest part, and I spent most of the time dealing with the derailleur pieces.

Cassette off the wheel

Tire with tube removed, everything is ready to be put on the new wheel.

The clean gears and cassette on the new wheel.

Fully assembled.

The one issue I had with with the repair was the rim I replaced was double-walled, so the spokes were recessed.  The new wheel is only single walled, so it is weaker, and will probably need some truing down the road.  So far it rides fine, and I don’t really notice a difference.