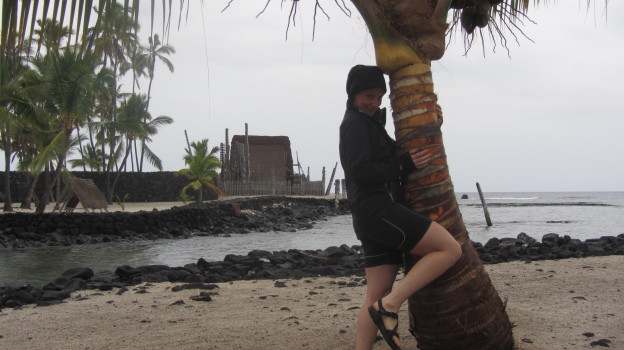
After spending two days SCUBA diving (and two glorious nights sleeping indoors in real beds at the Hilton – we hadn’t slept indoors in nearly a week!) we turned our interest toward lava hunting! Our biggest motivator in visiting the Big Island, after diving, was the active volcano. Once done with our second day of SCUBA, we departed Kona and skirted the coast toward our next campsite. We plotted a course which would bring us no higher than 2000′ in elevation to avoid decompression sickness – we actually had to make a last minute change in plans from a campground at 4000′ to one at sea level. This oversight turned out to be a blessing in disguise. We chose to camp at Punalu’u Black Sand Beach, which is more or less on the way from Kona to Hawai’i Volcanoes National Park. It was difficult to find in the dark, and upon arrival we encountered some locals semi-permanently camped not far from us. The place seemed kind of run down, but sleepiness got the best of us and we settled for the present situation. The tent sweltered as we dozed off in the dark.  When we awoke we were pleasantly surprised. For starters there were no roosters (the big island seemingly does not have same rooster plight that Kauai does). But the real win was the serenely beautiful scenery surrounding us which previously had been hidden from us by the dark. We strolled along the shore, spotting turtle tracks in the dark sand and taking in a stellar sunrise – it was around 75% cloud cover but the interplay between light and cloud made things that much more dazzling.

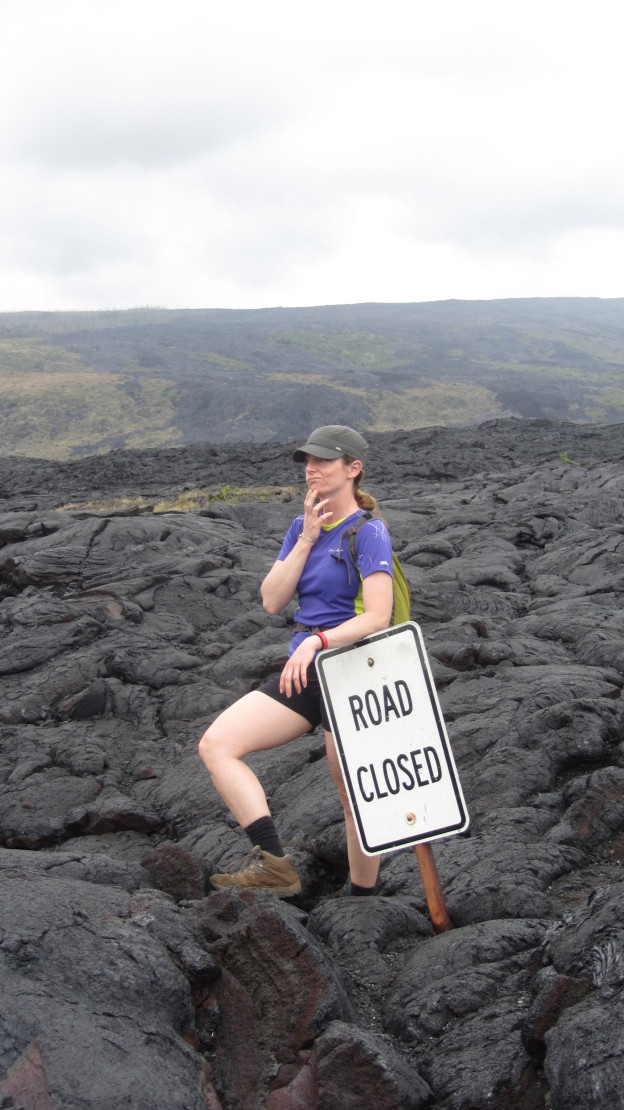
 After taking our fill of the view, we packed up our camp and set off for higher elevations. As the trip wore on, we grew less and less excited about breakfasts of peanut butter and rice cakes in our tent. We caved in to temptation and dug into the breakfast buffet at the National Park Visitor Center. The visitor center is situated by edge of the Pu’u O’o crater offering exceptional views. A spectacular gaping maw rips through the earth, miles wide. Very little life exists at the floor of the crater – only a variety of stunted shrubs seem to grow down there. Steam wafts up from various fissures in and around the crater. Toward the center of the devastation an ominous pit seethes with steam and sulphurous fume – we can’t see it from here, but a lava lake burns at the bottom of this acrid, smoldering hole in the earth. We had planned to circumnavigate the entire crater region, stopping at the various points of interest along the way. As it turns out the prevailing wind was pushing the noxious gases North-Northwest and those quadrants of the park were closed. The fumes are toxic in large enough quantities – and there seems to be an endless supply. We were forced to loop around the crater in a clockwise fashion and were unable to get as close to the devastation as we had hoped. As it turned out, the ‘left overs’ were plenty stunning… We started our sightseeing at the sulfur banks. These oddities seem to litter the landscape, but are apparently best seen from a concentration of them near the visitors center. The seismic activity causes moisture in the ground to evaporate and as the sulfur eats away at the earth, a vent slowly opens up. A stinky haze rises out of the vents, and evidence of them can be seen all over the region. We got a few up and personal views.

A little bit noxious…

The fumes leave a greenish, chalky, and fragile deposit on the nearby rocks.

Next up, was the main crater. We rode up to the Hawaiian Volcano Observatory at the Jaggar Museum. The Observatory offers some of the best views of the Kilauea Caldera and the Halema’uma’u Crater within. Venturing into the caldera is pretty much off limits, and for good reason.

Scoping out the Kilauea Caldera
As a consolation prize we opted to descend into Kilauea Iki Crater. This smaller, yet still mightily impressive feature was the result of the now defunct Pu’u Pua’i Volcano. The eruption created a crater and lava lake, which eventually cooled leaving a deserted plain in the depression surrounded by the jungle.

On our way into the crater.

A glimpse of the Kilauea Iki Crater. You can see our future traverse crossing the barren and dried lava lake.

On our way into Kilauea Iki with Kilauea Caldera in the backdrop.

Traipsing across miles of seemingly endless slag and cinder.

The semi destroyed dome in the background is the volcano that created this crater.
 After exiting the crater, we take a quick stroll through the Thurston Lava Tube. It’s certainly one of the more touristy sites in the park, but you seem to appreciate it more thoroughly after trekking across a barren lava desert. Touristiness aside, it’s a short detour and worth checking out if you don’t have time to investigate any of the more secluded formations hidden on the island. (We had planned to explore a ‘secret’ lava tube to the north of Pu’u O’o, the active volcano, but were thwarted by the winds.)


After we’d had enough bobbing and weaving through sluggish, Greyhound-borne tourists, in the lava tube we headed down Chain of Craters Road. As the tectonic plates which Hawaii rests on slid over the earth, the volcano remained in the same spot, thus perforating the land with various eruptions which appear as a chain across the landscape. Along the chain, all sorts of lesser known craters can be found.

A short stroll from Chain of Craters Road leads to Devil’s Throat.
We circumnavigated the caldera as far as conditions would permit. At the southern rim we were treated to far less traffic and very exciting views. We ditched the rental car and proceeded on foot to the edge of safety, getting as close to the volcano and the destruction as we could. To the south more defunct craters dot the landscape, while the north shows a different picture of the turmoil which wreaked havoc on the land in years past. Massive fissures streaked across the earth between the road and the edge of the Caldera where ‘skirt’ eruptions rose up from the ground; apparently the primary eruption was insufficient to relieve the pressure building below the earth.

Massive fissure left by an eruption

Keanakako’i Crater
Our final adventure of the day led us to the Volcano Winery, which we’d read was worth a visit for the tasting, of not to buy some wine. Turns out the volcanic soil is good for growing grapes. We tasted some exceptional and unique wines, including a Macadamia Honey Meade. Macadamia honey is different from typical honey in that it is produced by bees which nearly exclusively pollinate macadamia trees. And, there was indeed an essence of macadamia to be found in the wine! Unfortunately, at something outstanding like $40 / 750mL, were found ourselves in the market for only a tasting of that particular variety. In truth the Winery is running a real racket, and we were pulled in hook, line and sinker. Upon entering the shop, an employee quickly directs you to one of the tasting bars, where a skilled expert deftly gives you the run down on the offerings and pours and rinses your tasting cup between strategically ordered pours of one vintage or another. The tasting is actually quite affordable, and they have act together. In short order we were convinced that we needed as least two bottles of wine from this place. At the checkout area we were easily convinced that we needed a cheese and cracker platter to go with our recent purchase. The fact that we hadn’t eaten lunch certainly did not help, but you had to hand it to these people: they reeled us right in with hardly a fight. Anyway, about $60 later we were on our way back to our campsite for some pre-dinner snacks and a change of clothes before our ‘night out’.
We had set up camp at Namakani Paio Campgrounds, which is about a 15 minute walk downhill and north of the Jaggar Museum and Observatory. Once it was good and dark, we packed up our wine and cheese, grabbed some headlamps and trekked uphill to the observatory.
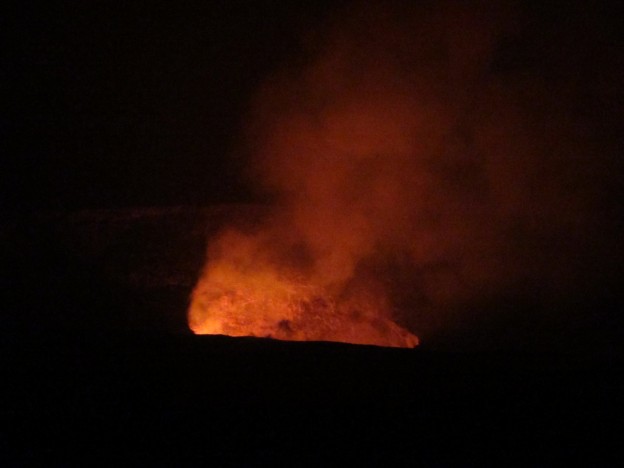
After being a tiny bit underwhelmed at the sight of the lava lake during broad daylight, we were just about totally blown away by the same scene at dark. The fiery pit glows red hot, decorating the rising steam and smoke, and playing off of any clouds that pass overhead. Here I really wish I had a tripod and some real camera skills. Google may reveal some more breathtaking shots than the ones we produced, but for posterity, they’re shown below. We found a secluded spot along the observatory wall, uncorked our Volcano Wine, and gazed at the all natural fireworks show before us.


Gear List


