Here’s the deal: this is going to be a lengthy walk through regarding mounting AT bindings on skis. Be forewarned: this should be fairly dry unless you are specifically interested in the process. If you’re not you might consider skipping this one. Or maybe just look at the pictures.
And I should probably also make a brief disclaimer. I have no formal training in performing any of these activities. As qualification, I offer only my reassurance that I take my skiing very seriously. Anyway…
What Is Being Performed?
Last year I re-mounted my Marker Dukes on my Black Diamond Havocs using Quiver Killer Binding Inserts. They had previously been mounted using the conventional technique. At about the same time I installed Quiver Killers in my Head Monsters. These had never been mounted before. These processes are described here.
For this season, I’ve decided to enhance those two pairs of skis, by adding to each, a set of Binding Freedom Inserts for a used pair of Dynafit FT12 bindings that my friend Rob helped me snag for cheap on the TGR Gear Swap Forums.
Why Would You Do This?
The result would be two pairs of skis capable of sharing two pairs of bindings which could be configured to meet the demands of a variety of situations.
Let me run through the design decisions. The dynafits were added because I thought they’d breath new life into two aging pairs of skis. While I love both pairs, they are obsolete: they’re both conventionally cambered and not especially wide. The Havocs are a great all-mountain and side country ski when rigged with the Dukes, but they weigh a ton for serious touring. The Monsters just can’t really handle hard-pack because they’re too flimsy, so I need to be able to fall back on the Havocs on occasion. However, the Monsters are borderline ultralight making them a ideal touring ski for light powder and soft snow. It seemed a waste not slap on an ultralight pair of touring bindings in lieu of the Dukes. Finally, I can cut down mileage on the more costly FT12s by saving them for back-country touring and using the nigh indestructible Dukes for in-bounds and side country action.
I went with the Binding Freedom Inserts rather than the Quiver Killer Inserts this time around for a number of reasons. The first was simple curiosity. It seemed prudent to see what else might be available. Next, the Binding Freedom Inserts are reputed to be manufactured using a slightly superior process. The Binding Freedom Inserts are fitted for a flat head screw driver so that they can be easily installed. Additionally, the Binding Freedom page sells all of the associated hardware: the ski bit with a stop collar, a tap and tap handle, and the mounting screws fitted for an Allen wrench and prepackaged according to binding type.
The Process:
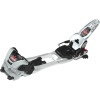
The first thing I do is pull the Dukes off of the Havocs, just to get that out of the way. This is done easily with a #2 Philips screw driver. More here.
 |
| Removing the Marker Dukes from the BD Havocs. |
I decided to mount the Monsters first, since they would be the most challenging: I’d have to work around the screw ups left over from last year. I decided to start by removing the brakes from the heel pieces of the Dynafits. This is supposed to make the mounting process easier. It certainly made it easier for me to use the toe and heel plates as rough templates while initially sizing up the situation. This process is described very well at WildSnow. Here’s my rendition…
To remove the bakes, you must first unscrew the large, grey knob from the back of the heel piece using a large flat head screw driver. The grey piece is under tension and will spring out once its totally un-threaded. Next you should remove the two nested springs that sit inside the cylindrical opening on the back of the heel piece. Finally, using a paper clip or similar, you must fish out the white plastic bushing that resides in the far back of this cylinder.
 |
| Unscrew the cap, and remove the innards. |
 |
| There is a small hole in the back center of the bushing which you can use to fish it out. |
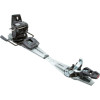
With these activities accomplished, you can simply pull the tower of of the center post, as shown.
 |
| Simply pull up. |
The next challenge is to get the brakes dislodged. This is tricky if you’re brakes are new. If they’ve been used, they come off slightly easier. Either way, the first step is to pry the stopper plate up using a flat head screw driver or similar, shown below.
 |
| Pry off the stopper plate. |
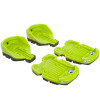
And finally, using some pliers and a few extra sets of hands, you can spread the two pins apart and pull the brakes off of the heel piece by pulling the whole brake assembly forward toward the tapering end of the heel plate, as seen in this short clip:
The next line item is to come up with a center line on your skis. This is by far the most important step of the whole procedure. Fortunately, it’s not that hard. Using a carpenter’s square, straight-edge or similar, measure the width of the ski about 6 inches ‘North’ of the waist of the ski. Mark this sport using a strip of masking tape, and take note of the width.
 |
| Measure the width with some kind of reasonably precise instrument. |
 |
| Take note of the width. Recall which edge of the tape actually corresponds to your measurement. I’ve used the straight un-torn edge to avoid confusion. |
Repeat the process some where ‘South’ of the waist of the ski. As long as these measurements are taken reasonably far apart from each other (but not so far that the curvature of the ski starts to skew your carpenter’s square) you’ll be able to produce two points at the center-line of the ski, and by connecting these two points, you can easily reference the center-line while you’re working.
 |
| Some point ‘South’ of the waist. |
 |
| Divide by two to arrive at the mid point. |
 |
| Repeat for both measurements. |
Now flip your ski over. Using your masking tape references, midpoint calculations, and square, find the midpoint of each line. Mark this point using a sharp knife. You can get away with scoring the top-sheet a bit as long as you don’t break through to the core material.
 |
| Marking the midpoint. |
With both midpoints marked, you can connect the dots using a large framing square. Simply, place the square on the top-sheet, line it up with your two midpoint markings, and trace a straight line using a sharp blade.
 |
| Marking the center line. |
The next big step is to determine where along this center line you’d like to mount your bindings. In my opinion, this is fairly subjective. Ski manufacturers sometimes mark the waist of the ski on the top-sheet, but these markings aren’t always reliable, forcing you to double check anyway. Many manufacturers suggest a mount point for each of the skis in their line, but again, this is just someones opinion. They have no idea what sort of skiing you intend to do, nor what sort of bindings or boots you plan to use. In my particular case, I was constrained by the old mount points of my Dukes. At the end of the day, you need to make a judgement call about where you want your bindings to be. Once the first binding is on the ski, you can use it as a gauge to line up the second binding. More on that later. For now, here’s how I figured out the mount points on my first ski.
Step number one: go to WildSnow and grab their excellent Dynafit mount template. I printed my templates on some nice card stock so that it would be easy to work with and withstand some abuse. Make sure your printer doesn’t scale the template. You can check for correct scaling by placing the bindings on the template and eye-balling it.
Step number two: separate the heel piece and toe piece parts of the template. You want the two pieces to be independent, mostly so that they don’t get in the way. I found it helpful to trim the templates so that the center-line printed on the templates extends to the edge of the template. This allows for great precision when placing the templates on the ski.
With your templates ready to go and a good idea of where you want your bindings, grab a ski boot and line the whole thing up for size. The two divots sit right between the four drill points on the toe piece, and the heel template indicates the rough position of the boot heel. Use these metrics as guides. Place your templates, and boot on the ski and be sure this makes sense! In my case, I had to jockey things around a bit until I found a reasonable mount point that wouldn’t interfere with my Duke mount points. People with fresh skis will find this process much easier.
Once you are satisfied, tape the toe template to the ski making sure to get the template center lines matched up to the center line previously scored into the top sheet. Fasten the template using masking tape. Masking tape is usually thin enough that you can see straight through it and find the center line on the top sheet. Getting this right is probably the most important step of the entire procedure. Once you are happy, use a hammer and a sharp knife, a nail set, or center punch to mark the mount points by placing your pointed implement on the template and giving it a few good whacks with the hammer.
 |
| Marking the drill points. |
 |
| Here I’ve circled the drill points with a dry erase marker to make them easy to find when it comes time for the drill. |
With all of the drill points marked and highlighted, it’s prudent to do a quick dry fit, using your toe piece and boot. Place the toe piece over your markings, step the boot into the toe wings, grab your heel template, match up the rear of the boot with the rear template, and double check that this still make sense! Nothing irreversible has been done yet, so lets be sure!
Once you’re happy with all of this, it’s time to start drilling! One the lessons learned from last time around was that wide bits have trouble breaking through the top sheets on some skis. They tend to ‘walk’ around the top sheet before breaking through resulting in a totally messed up pilot hole. The solution: drill a pre-pilot hole with a very small bit. I used a 3/32″ bit; though I imagine one slightly smaller or larger would have been fine as well. Next I pulled out some carpentry shims, some large C-clamps and the drill press and lined the whole thing up carefully. You should be able to lower the press right into the divots marked on the top sheet.
 |
| Shims and clamps for added security. |
 |
| Lower the press right onto the top sheet to see that it all lines up after tightening the clamps. |
 |
| Now for the fun part! |
Drill out the 5 pilot holes, just deep enough to break the top sheet. It’ll be obvious when you’re though. Re-chuck the press with the ski bit (also available from Binding Freedom). Using a binding insert as a guide, ensure that the stop collar is actually set to the right depth. Line up the press and get to work…
 |
| Before drilling lower the tip of the bit into your pilot holes. |
 |
| Progress… |
With our first set of pilot holes bored out, we’re ready to tackle the inserts. To ensure that no residual machine oils are left over from manufacturing, I drop the whole bag of them into an alcohol bath. The alcohol is useful for working with the epoxy, as well, but more on that later…
 |
| Dump the inserts into a Tupperware and submerge in alcohol. |
Next up: tapping the pilot holes. In order to set the inserts into the ski, the pilot holes need to be pre- threaded using a bottom tap (again, purchased from Binding Freedom). Using an insert as a guide, mark the the correct tap depth using masking tape. If you turn the tap too far, you’ll start to poke into the P-Tex and deform the base of the ski. This can be fixed but not without a base grind… You can use a stop collar, but it’s overkill here… Once the depth is set, start tapping!
 |
| Measure the tap depth. |
 |
| Carefully tap each pilot hole. |
With the pilot holes tapped, we can get ready to set the inserts. To permanently anchor them and to weatherproof the core material, shoot a dollop of 24 hour weatherproof epoxy into each threaded pilot hole. I prefer to do this liberally: you want the entire inside of the pilot hole, threads and all, to be coated. This will prevent the core material from slowly rotting out.
 |
| Don’t be stingy with the epoxy. |
With the pilot holes epoxied, grab an insert, towel it off quickly, and crank it into the ski with a flat head screw driver.
 |
| The first insert set, just slightly recessed below the top sheet. |
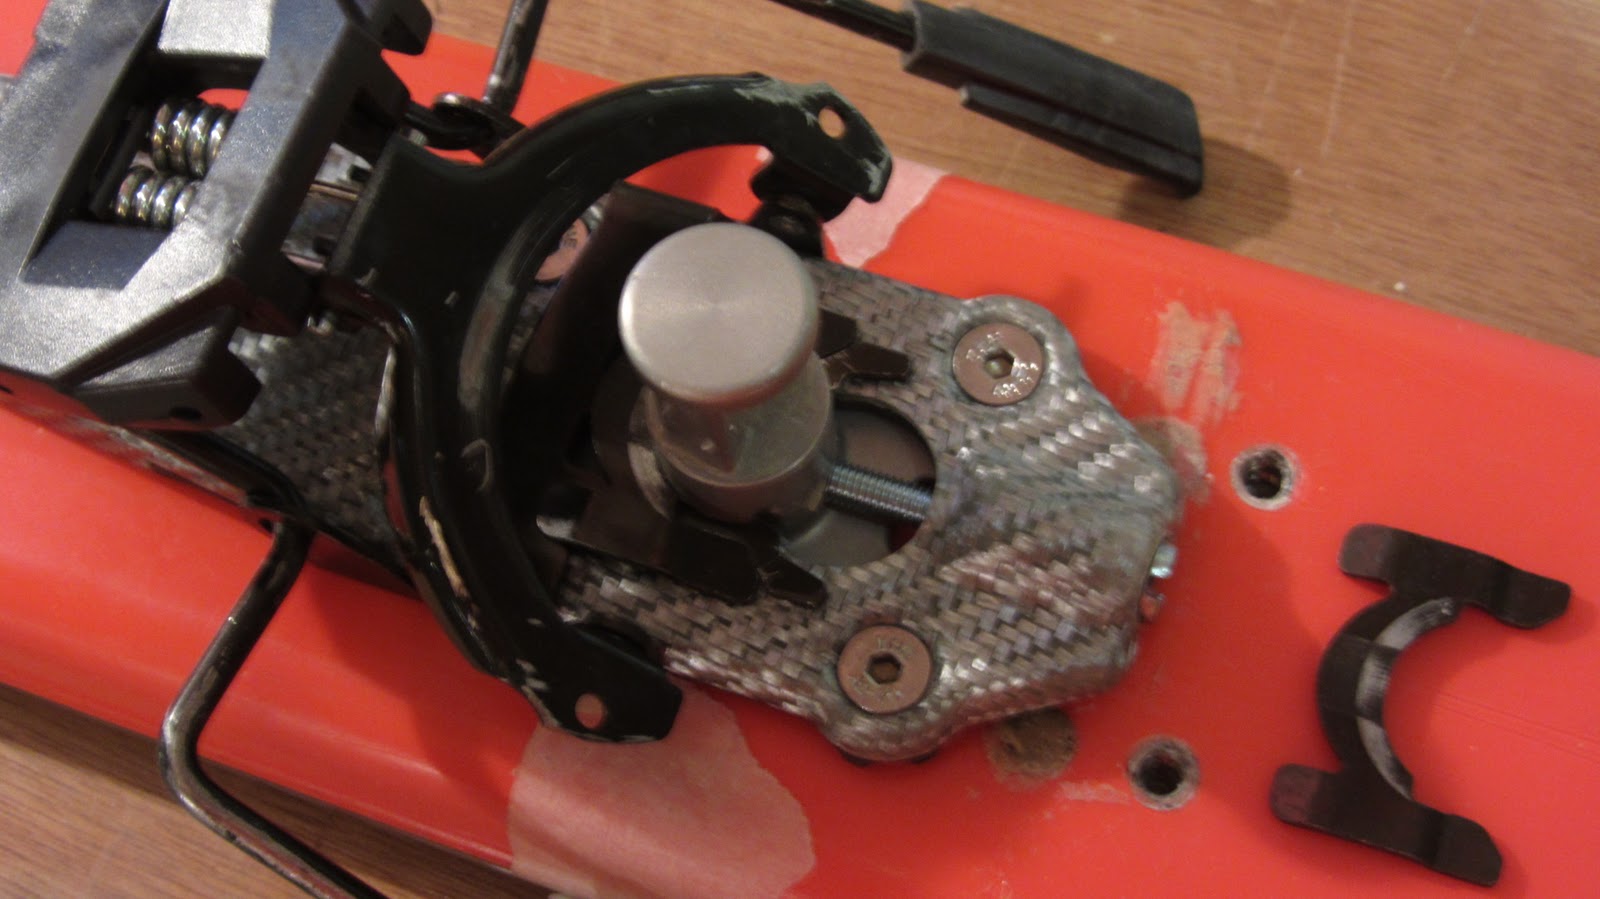
Now you’re ready to mount the toe piece! Place it over your new inserts, locate the long M5 screws (guess where these came from…) and crank them down with an Allen wrench.
 |
| Toe piece in place. |
 |
| Top down view. |

 |
| Wide head M5 screws for the four read points, and the small head M5 for the fifth point. |
 |
| Toe wings locked up with the fifth screw visible under the release latch. |
Hopefully this all goes smoothly. Unless you have the hands of brain surgeon, you may find it easiest to tighten the screws a little bit at a time, rather than completely setting each screw one at a time. This will allow you some play in case one of the inserts is off a bit. Since the epoxy won’t cure fully for 24 hours, any imperfections will work themselves out as long as you leave the completed bindings screwed in over night.
To correctly fit the heel piece, you need to step into the toe piece and size things up using the template and a carpenter’s square. Quickly reassemble the heel piece and line it up with the rear of the boot, just as a sanity check. If all looks well, grab the heel template, match up the center lines, align the heel of the boot with the template guidelines and fasten with masking tape.
 |
| Line up the toe divots and ‘step’ in. Lift the release latch, to lock. |
 |
| Dry fit the whole assembly, just to be safe… |
 |
| The bold line in the middle of the template should line up with the heel of the boot. |
 |
| Use a carpenter’s square to line up the bold line and the boot. Be sure to keep the center lines matched up. |
 |
| Side view of the previous step. |
 |
| Rear view… |
 |
| Heel template fastened and ready for marking! |
 |
| Repeat the marking, drilling, and tapping steps described above. |
 |
| The heel piece should be ready for installation, using the four short M5 screws and an Allen wrench. |
 |
| Slide the brake assembly back over the heel plate. |
 |
| Wedge the stop plate back between the center post and the brake assembly to secure it. |
 |
| Ski number one complete! |
 |
| Boots clicked in with success… |
Most of the tricky stuff has now been completed, however one critical step still remains: we need to figure out how to mount the other ski in exactly the same place. The solution I arrived at was to trace a straight line across the ‘Northern-most’ toe piece inserts, drape a long piece of masking tape along the line, stand both skis base to base on end, and wrap the loose ends of the tape around the other ski.
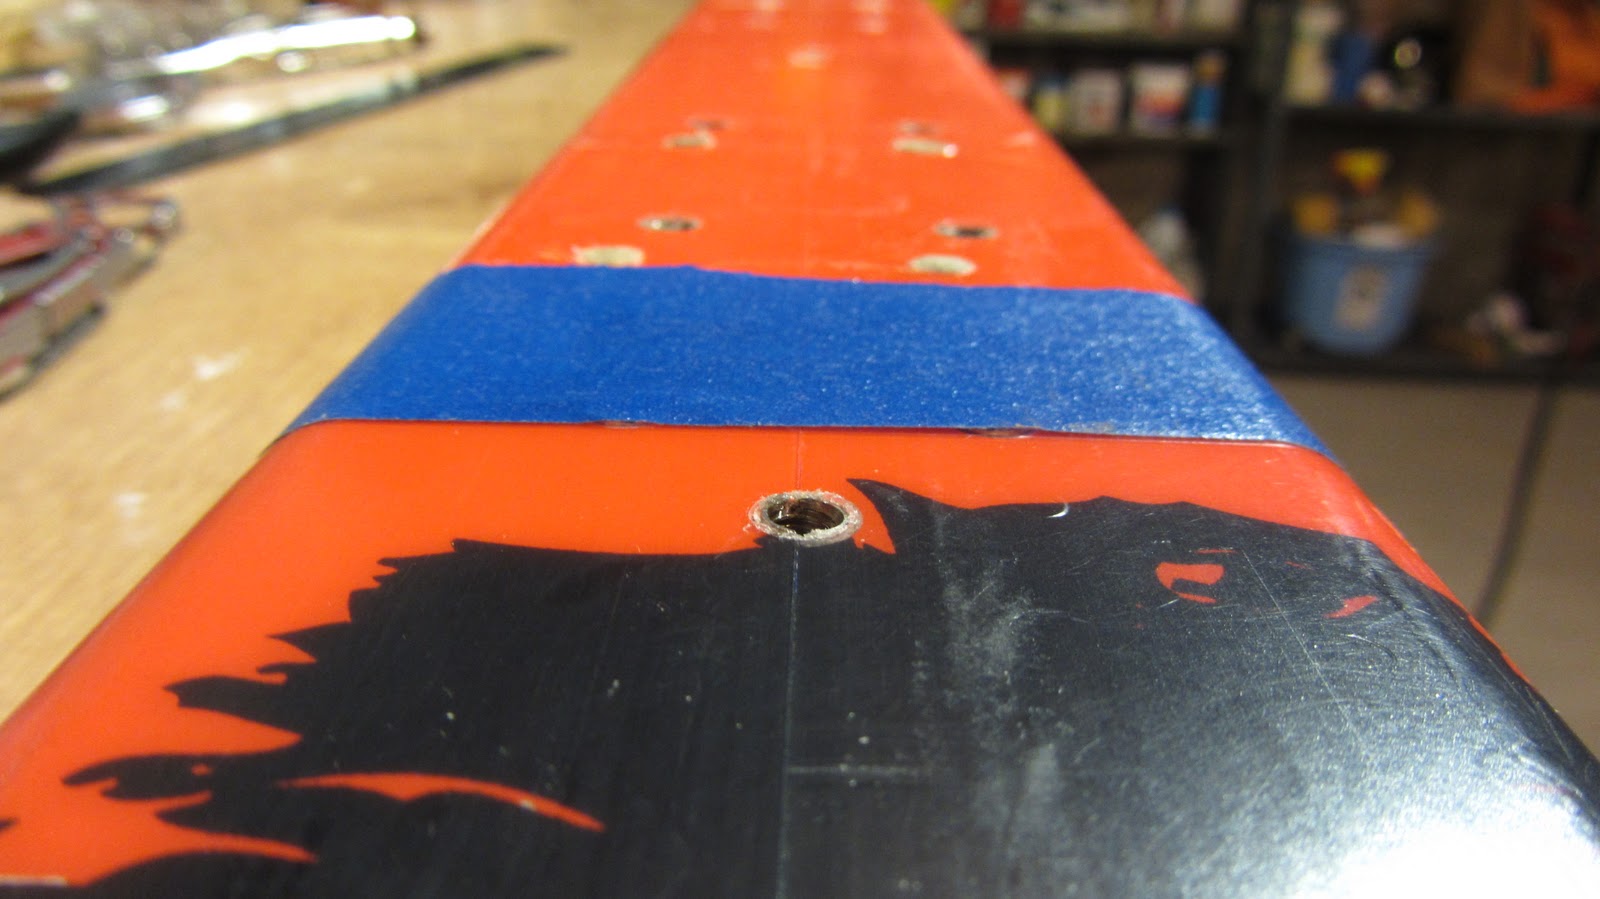 |
| The first ski sans binding. |
 |
| The second ski, with the relative location of the toe piece marked. |
 |
| Separate the skis for convenience. |
 |
| The second ski with the center line and toe piece marked. |
With the positions of the toe piece marked, you simply repeat the entire process on the second ski.
 |
| Monsters ready to rock, Havocs on deck. |

Gear List (click links for more product info):